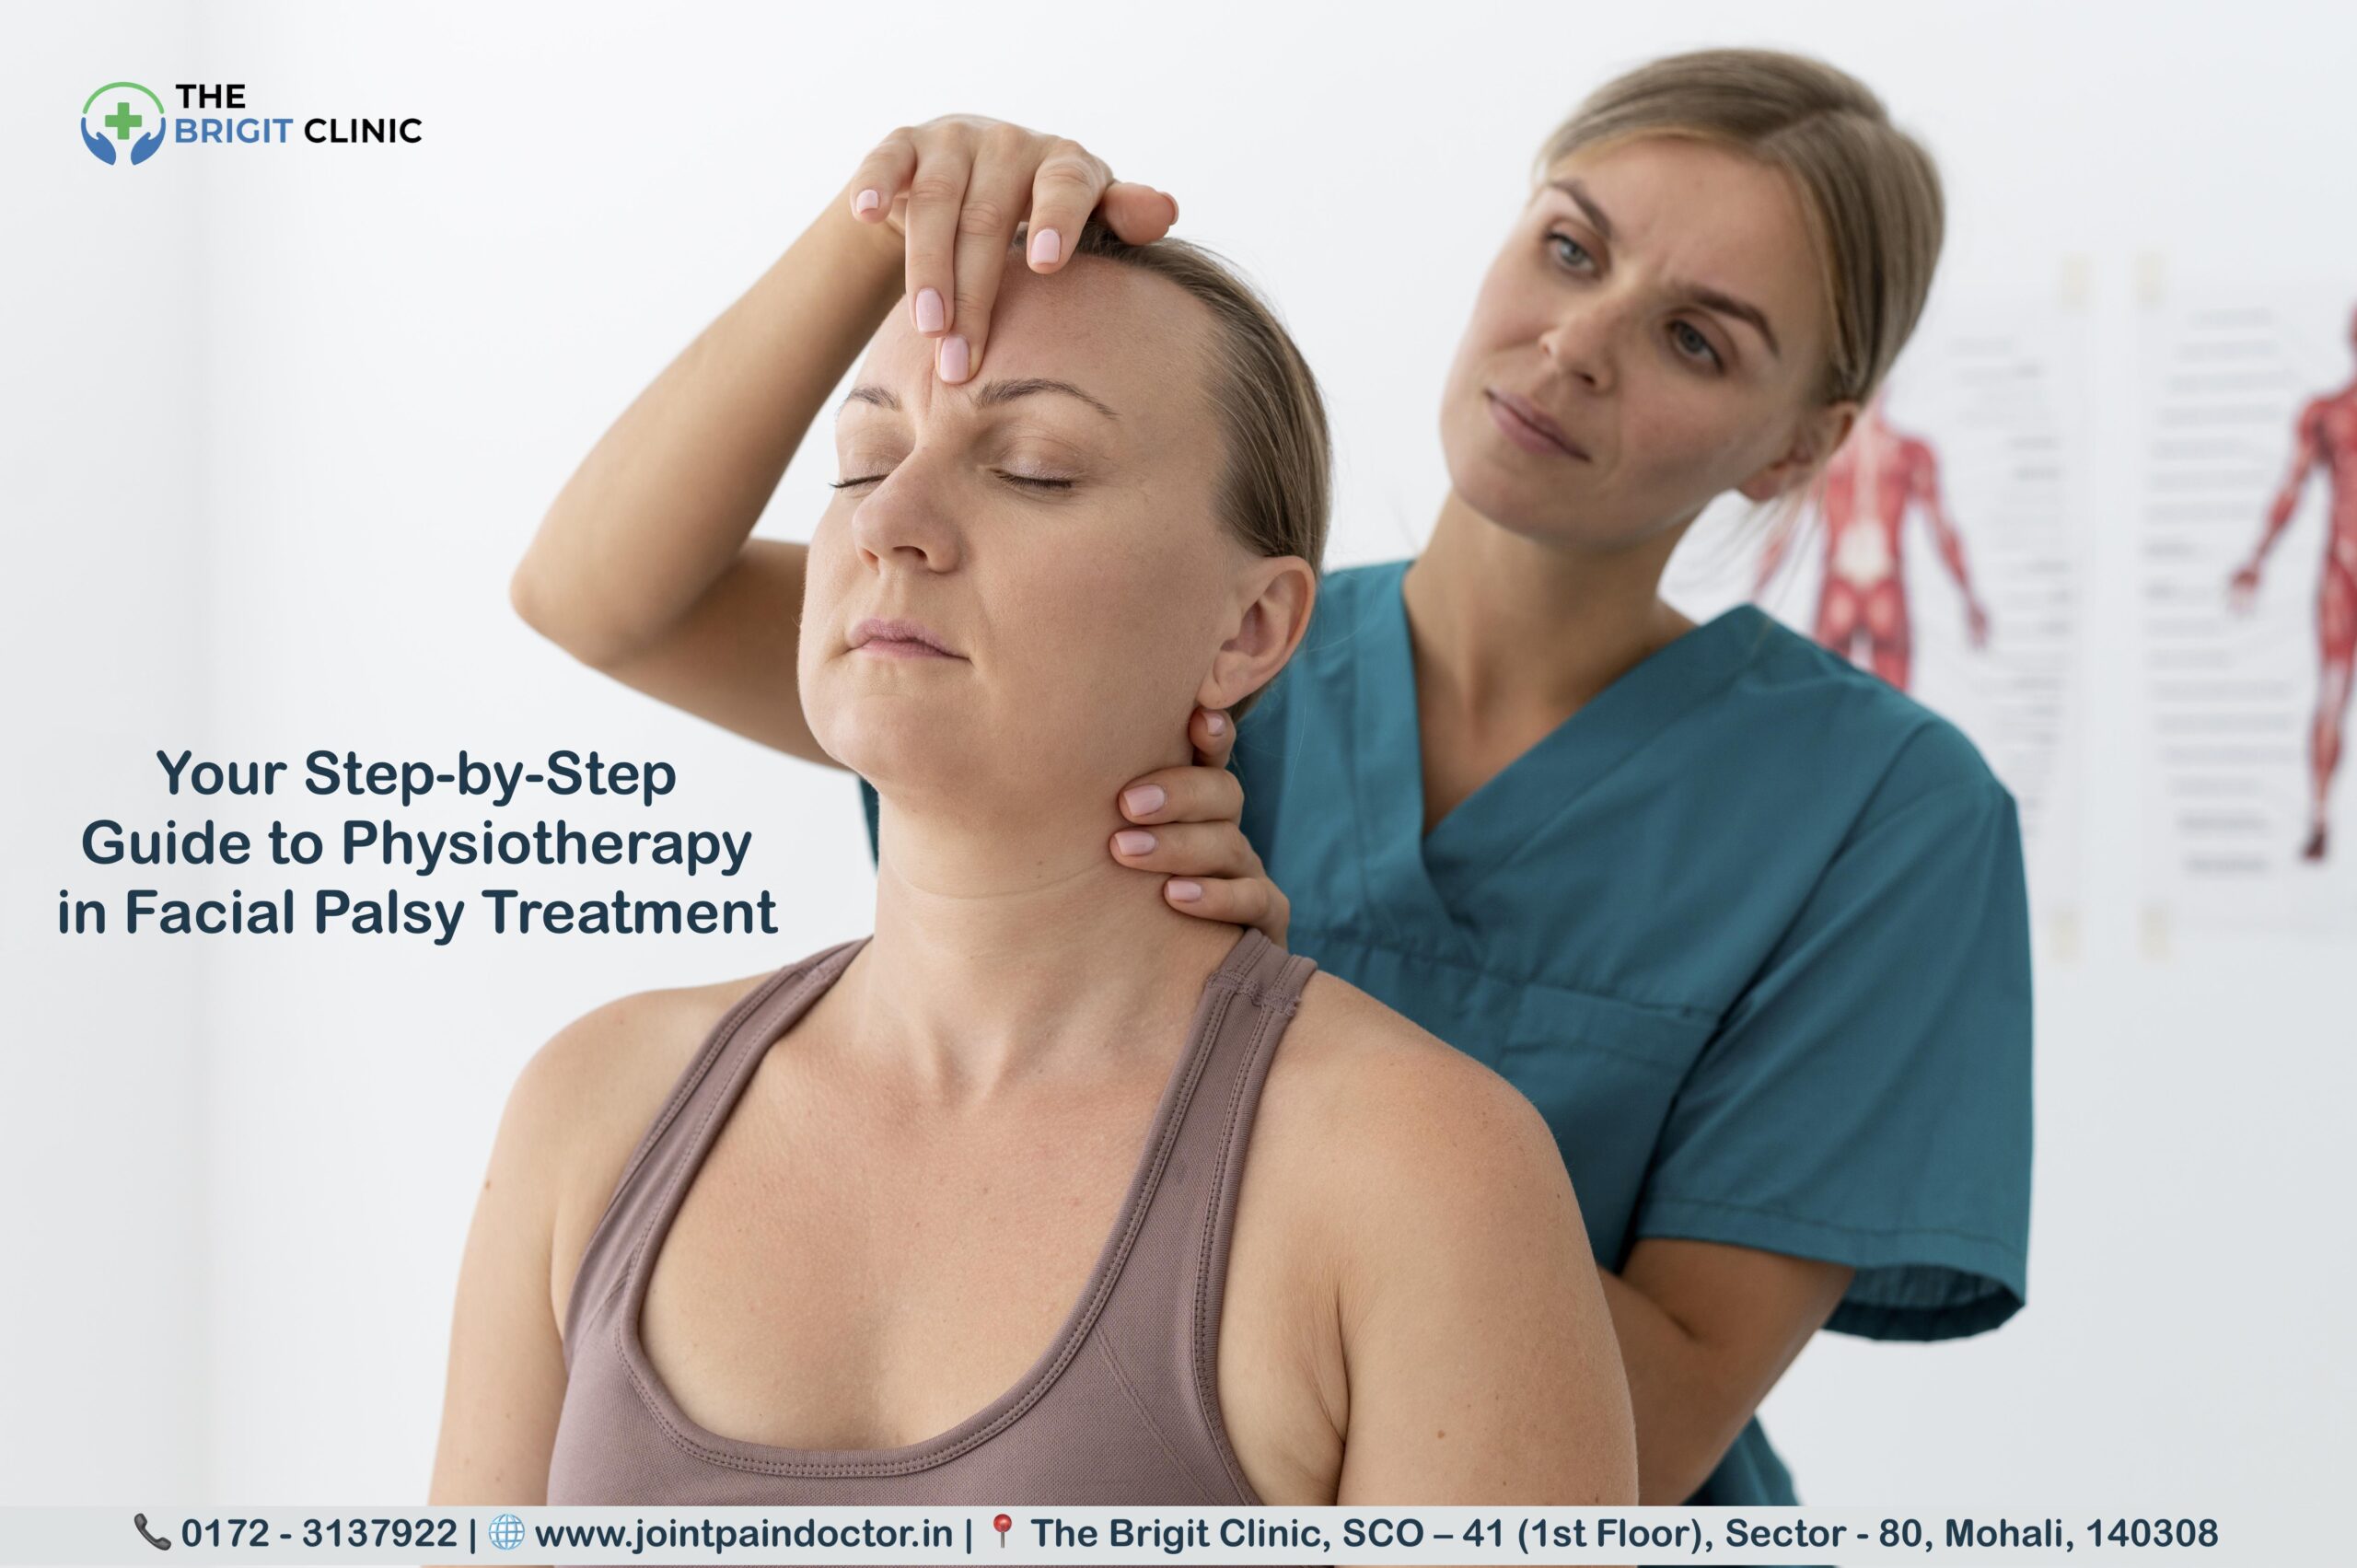
Your Step-by-Step Guide to Physiotherapy in Facial Palsy Treatment

Bell’s palsy and other forms of facial nerve paralysis affect 11-40 people per 100,000 annually, with physiotherapy in facial palsy emerging as a crucial treatment approach. Unfortunately, one in three patients (29%) experiences poor recovery, resulting in permanent facial function deficits. This can lead to significant psychological distress, depression, and even social alienation as people withdraw from public-facing roles.

Fortunately, the evidence, though limited in size, strongly supports the use of facial palsy exercises and rehabilitation techniques to accelerate recovery and minimise adverse outcomes. In fact, approximately 70% of people with Bell’s palsy recover completely without treatment within 3-6 months, but with proper physiotherapy interventions, we can potentially improve outcomes for the remaining 30%. Additionally, research indicates that facial exercises may significantly improve facial function, especially when combined with other treatments.

In this comprehensive guide, we’ll walk through everything you need to know about physiotherapy for facial nerve paralysis – from recognising symptoms to implementing advanced rehabilitation techniques for recovery of facial symmetry. Whether you’re dealing with post-stroke facial palsy or Bell’s palsy (which accounts for about 60-75% of all facial paralysis cases in the United States), this step-by-step approach will help you understand how neurological rehabilitation can restore both function and confidence.

Ready to begin your recovery journey? Trust your care to  Mohali's Top Physiotherapist at The Brigit Clinic. We create personalised plans for optimal results. Schedule Your Assessment Today!

Step 1: Recognising the Signs of Facial Palsy

Facial palsy can appear suddenly or develop gradually, causing varying degrees of muscle weakness on one or both sides of the face. Recognising these symptoms early allows for prompt intervention, potentially improving long-term outcomes through timely physiotherapy and medical care.

Early symptoms to watch for

The onset of facial palsy symptoms can be quite dramatic – appearing overnight or developing over two to three days. In other cases, symptoms may emerge gradually over weeks or even months. Initially, you might notice:

  • Drooping or flattening on one side of the face
  • One-sided smile or difficulty making facial expressions
  • Problems closing your eye completely on the affected side
  • Facial droop affecting the brow, eye, cheek, and mouth
  • Drooling due to reduced muscle control
  • Pain around the jaw or behind the ear
  • Increased sensitivity to sound
  • Headache or slight fever

The severity can range from mild weakness to complete paralysis of facial muscles. Furthermore, some people experience numbness or heaviness in their face, yet can still feel touch and temperature sensations. Changes in tear production and saliva may also occur, along with potential taste loss.

For most people with Bell’s palsy (which accounts for many facial palsy cases), symptoms reach their maximum severity within 48-72 hours. During this period, you’ll likely notice the most pronounced facial asymmetry.

When to seek medical help

If you experience any sudden facial weakness or drooping, seek medical attention immediately. This is crucial because facial paralysis can sometimes indicate a serious condition like stroke, even though most cases turn out to be Bell’s palsy.

Call emergency services (911) immediately if facial weakness is accompanied by:

  • Weakness or paralysis in arms or legs
  • Difficulty walking or coordination issues
  • Slurred speech or difficulty speaking
  • Blurred or double vision
  • Suddenly, a severe headache
  • Memory loss or confusion

Generally, even if facial weakness is your only symptom, you should visit your doctor as soon as possible for proper diagnosis. This is particularly important since early treatment with steroids (within 72 hours) improves outcomes for Bell’s palsy – 83% of treated patients achieve full recovery compared to only 72% of untreated patients.

Additionally, seek prompt medical evaluation if symptoms develop slowly over weeks or months, as this might indicate an underlying condition requiring specialised treatment. Similarly, contact your healthcare provider immediately if you notice painful vesicular rashes in or around your ear, mouth, or scalp, as this could indicate Ramsay Hunt Syndrome requiring antiviral medication.

Post-stroke facial palsy indicators

Central facial paralysis (CFP) affects approximately 45% of stroke patients. Unlike Bell’s palsy, post-stroke facial weakness typically affects only the lower part of the face – the area below the eye clefts. Moreover, you might observe:

  • The ability to wrinkle your forehead and raise eyebrows remains intact
  • Weakness primarily affects the mouth and cheek region
  • Associated symptoms like dysphagia (swallowing difficulties) and dysarthria (speech problems)
  • Increased muscle tension and decreased muscle strength

Post-stroke facial palsy often coincides with other stroke symptoms previously mentioned. Consequently, prompt medical care is essential as this represents a medical emergency requiring immediate treatment to minimise brain damage.

Beyond physical symptoms, facial paralysis frequently causes psychological impacts. Patients with facial paralysis are more likely to experience anxiety and depression, which may subsequently affect motivation during rehabilitation. Therefore, recognising and addressing both physical and emotional aspects is vital for comprehensive recovery.

Noticed sudden facial drooping or weakness? Early intervention is critical. Contact the leading Physiotherapy Clinic in Mohali for prompt evaluation and care. Call us at 📞 0172 - 3137922.

Step 2: Getting a Proper Diagnosis

After noticing facial weakness symptoms, obtaining an accurate diagnosis is crucial for effective physiotherapy in facial palsy treatment. A proper diagnosis determines both the cause and severity of your condition, directly influencing your rehabilitation plan.

Initial clinical assessment

The diagnostic journey typically begins with a thorough clinical examination by a healthcare professional. Your doctor will visually examine your face to assess the extent of paralysis and muscle control. During this assessment, they’ll ask you to perform specific facial movements like smiling, blinking, raising your eyebrows, and closing your eyes.

The clinical evaluation critically distinguishes between central nervous system causes (stroke, brain tumour, multiple sclerosis) and peripheral causes (Bell’s palsy, ear infections, facial nerve tumours). One key differentiator is the pattern of weakness – central facial paralysis typically spares the forehead due to bilateral innervation of forehead muscles.

Your doctor will gather important historical information, including:

  • When you first noticed symptoms
  • How quickly does paralysis develop
  • Whether you have any muscle control in the affected areas
  • Associated symptoms like hearing loss or tinnitus

Several specialised clinical tests may be performed, including the blink test (corneal reflex), Schirmer test (assessing lacrimation), stapedial reflex test, and taste tests. These evaluations help pinpoint the location of nerve damage within the facial nerve pathway.

Imaging and nerve conduction tests

Following the initial assessment, your physician may order additional diagnostic tests. Although imaging studies aren’t typically indicated in early evaluation of Bell’s palsy, they become necessary with certain warning signs – parotid mass, facial twitching, or additional neurologic symptoms.

MRI scanning proves particularly valuable for examining the entire facial nerve pathway. It can identify swelling, compression, or growths affecting the nerve, and is especially useful for imaging the cerebellopontine angle. Within the first month of paralysis onset, MRI with gadolinium contrast may show abnormal enhancement of various nerve segments.

CT scans are primarily recommended if complications from middle ear infection, necrotising otitis externa, head trauma, or malignancy are suspected.

Nerve conduction studies offer an objective assessment of nerve function and integrity. These include:

  • Electroneurography (ENoG): Measures compound muscle action potential (CMAP) by stimulating the facial nerve at the stylomastoid foramen. Ideally performed within 14 days of onset, it helps determine the percentage of nerve degeneration by comparing affected and unaffected sides.
  • Electromyography (EMG): Evaluates electrical impulses along nerves and muscle tissue, helping assess weakness or paralysis in facial muscles. Unlike ENoG, EMG becomes most helpful 2-3 weeks after palsy onset and loss of nerve excitability.

The amplitude loss percentage calculated from nerve conduction studies provides valuable prognostic information. An abnormal facial nerve ultrasound has a negative predictive value of 77% for poor recovery (House-Brackmann Grade II or worse at 3 months).

Grading the severity of facial nerve paralysis

Once diagnosed, physicians use standardised scales to quantify the degree of facial paralysis. The House-Brackmann scale, approved by the American Academy of Otolaryngology-Head & Neck Surgery, serves as the reference standard. This six-point scale grades facial function from normal (Grade I) to complete paralysis (Grade VI).

The House-Brackmann classification evaluates both function at rest and with effort, making it comprehensive yet simple enough for clinical settings. Nevertheless, it has limitations in sensitivity for recording clinically significant changes.

For a more detailed assessment, the Sunnybrook facial grading system offers advantages. It evaluates facial symmetry at rest, voluntary movements, and synkinesis using a 0-100 scale (where 100 represents normal function). Physiotherapists often prefer this system for its sensitivity and specific assessment of synkinesis.

Other systems include the Sydney facial grading system, which assesses facial actions based on individual branches of the facial nerve. These standardised assessments provide objective measures for tracking progress throughout your physiotherapy journey.

Need a clear diagnosis and a path forward? Our Best Physio Clinic in Mohali uses advanced assessments to create your personalised treatment plan. Visit Our Clinic Page to Learn More.

Step 3: Starting Physiotherapy – What to Expect

Beginning physiotherapy for facial palsy involves several important steps designed to assess your condition, establish appropriate goals, and create an effective treatment plan. Understanding what to expect can help ease anxiety as you start this crucial rehabilitation journey.

First session: what happens

The initial physiotherapy session primarily focuses on a comprehensive assessment. Your therapist will gather detailed information about your symptoms, any recovery progress you’ve noticed, and other relevant medical history. This thorough evaluation helps determine the most effective treatment approach for your specific condition.

During this assessment, your therapist may use various techniques to evaluate your facial nerve function:

  • Surface electromyography (sEMG) – Painless sticky electrodes placed on your face measure electrical activity in various muscles when you’re still and when attempting movements like raising your eyebrows, closing your eyes, smiling, or whistling
  • Facial movement evaluation – The therapist examines muscle tone, normal movements, and any abnormal movements
  • Muscle condition assessment – Noting whether facial muscles are weak and floppy or short and tight
  • Eye health examination – Particularly important, as your therapist will provide advice about protecting your eyes from damage

At the end of the assessment, your therapist might recommend additional investigations if necessary, communicating with your referring doctor about further procedures.

Setting goals with your therapist

After completing the assessment, your therapist will help you understand how your facial nerve has been affected and the recovery process ahead. This educational component is crucial, as you’ll need to become intimately familiar with your face’s movements, appearance, and functions.

Your physiotherapist will classify your condition into specific treatment categories that guide goal-setting:

  • Initiation
  • Facilitation
  • Movement control
  • Relaxation

Together, you’ll establish realistic goals based on standardised assessment tools like the Facial Grading System (FGS), Facial Disability Index (FDI), House–Brackmann Scale, or Photoshop method. These tools help determine specific treatment objectives tailored to your symptoms.

Your therapist will undeniably emphasise understanding your facial motor dysfunction, teaching you to recognise desired movement patterns versus those to avoid. This awareness, especially when combined with biofeedback techniques, can minimise your risk of developing facial palsy complications.

Creating a personalised treatment plan

Based on your assessment results, the physiotherapist will develop a customised treatment plan addressing your specific needs. This plan typically includes a combination of approaches:

Core components often include:

  • Active-assisted exercises with small, controlled movements
  • Massage and stretching techniques to improve blood flow
  • Facial retraining therapy to strengthen muscles and teach proper function
  • Educational components about recovery processes and warning signs

For acute facial palsy (within the first 72 hours to 2 weeks), a multimodal approach involving a multidisciplinary team offers optimal results. Meanwhile, in the first 5 months after onset, your treatment plan will prioritise eye care to prevent corneal damage.

Your physiotherapist will explain that the quality of exercise performance matters more than quantity. Understanding this principle helps prevent abnormal movement patterns like synkinesis, which can develop if exercises aren’t performed correctly. Unlike other body muscles, facial muscles lack intrinsic feedback information, making precise, gentle rehabilitation through neuroplasticity essential.

Throughout your therapy journey, your physiotherapist will use photos, videos, and specialised software to track and visualise your progress. Most exercises should be performed in short sessions, typically three to four times daily, with up to 30 repetitions per exercise. Following your therapist’s recommendations for home practice is vital—repeating exercises several times daily gives facial muscles the best chance to relearn natural movements.

Uncertain about what physiotherapy entails? Let our expert team at the Best Physiotherapist Clinic in Mohali guide you through every step with compassion and expertise. Book your first session now!

Step 4: Core Exercises for Facial Muscle Recovery

Core exercises form the foundation of physiotherapy in facial palsy, directly targeting muscle weakness and coordination to restore function and appearance. These specialised techniques help activate muscles, promote circulation, and stimulate nerve regeneration while preventing unwanted complications.

Facial palsy exercises for symmetry

Rebuilding facial symmetry requires precise, controlled movements performed consistently over time. Essentially, these exercises help maintain muscle tone, reduce stiffness, improve mobility, prevent facial contractures, and develop better muscle control.

I recommend performing facial exercises 3-4 times daily in short sessions, with up to 30 repetitions per exercise. Accordingly, it’s best to:

  • Sit in front of a mirror to monitor your movements
  • Perform movements slowly and carefully
  • Use your fingers to gently assist affected muscles when needed
  • Stop immediately if you experience pain or discomfort

For optimal results, focus on specific muscle groups. Eyebrow exercises target the frontalis muscle, crucial for emotional expression. Eye exercises strengthen the orbicularis oculi muscle responsible for blinking. Nose exercises work the nasalis muscle, while lip and cheek exercises improve control of eating and speaking functions.

Stretching & strengthening routines

An effective strengthening routine should progress gradually as your control improves. Start with basic movements:

  1. Forehead workout: Gently lift your eyebrows while keeping your eyes open
  2. Eye control: Practice closing your eyelids tightly, creating wrinkles at the outer corners
  3. Nose exercises: Inhale deeply and sniffle, then wrinkle your nose and flare your nostrils
  4. Mouth control: Slowly pucker your lips together and push them forward

Throughout these exercises, use your fingers to prevent unwanted movement patterns or synkinesis, which could develop if exercises aren’t performed correctly.

Mirror therapy for coordination

Mirror therapy has emerged as a valuable technique for facial palsy rehabilitation. This approach uses visual feedback to stimulate different brain regions for movement, sensation, and pain.

During mirror therapy, you’ll perform facial neuromuscular retraining while observing your movements in a mirror. This creates visual stimulation to the brain, sending signals to move facial muscles repeatedly and preventing potential muscle contractures.

Research demonstrates mirror therapy’s effectiveness—patients receiving mirror therapy alongside standard rehabilitation showed significantly better results in House-Brackmann scores and quality of life compared to those receiving only traditional rehabilitation. One study found mirror therapy particularly helpful for improving face symmetry and decreasing synkinesis in the long term, with a quantifiable impact one year after onset.

EMG biofeedback in facial palsy

Electromyography (EMG) biofeedback provides an objective measurement of muscle activity, offering advantages over visual feedback alone. This technique uses surface electrodes placed on facial muscles to measure electrical activity during both rest and movement.

The biofeedback training typically spans two weeks, based on elements combined with Constraint-Induced Movement Therapy principles. Patients learn to perform facial movements more symmetrically while avoiding overly strong movements on the unaffected side and controlling unintended co-movements (synkinesis).

In a structured program, two bipolar foam hydrogel electrodes are attached to each side of the face, recording muscle activity in the cheek and mouth region. These electrodes connect to a biofeedback system that visualises muscle activity through feedback bars proportional to the activation level.

Studies show that biofeedback training leads to decreased overall muscle activity on both the synkinetic side and the contralateral side, demonstrating its effectiveness in facial muscle rehabilitation.

Struggling with facial symmetry? Our Physiotherapist in Mohali uses evidence-based techniques like mirror therapy and EMG biofeedback for effective recovery. Discover the difference expert care makes.

Step 5: Advanced Techniques for Better Results

Advanced rehabilitation techniques expand your facial palsy recovery options beyond basic exercises, often accelerating progress and addressing stubborn movement problems. These specialised approaches help patients who need additional intervention to achieve optimal facial function.

Neuromuscular re-education strategies

Neuromuscular facial re-education represents a sophisticated approach to facial rehabilitation that focuses on relearning movement patterns through specific feedback mechanisms. The process aims to facilitate proper muscle activity while suppressing abnormal movements that interfere with facial function.

This technique addresses a fundamental challenge in facial rehabilitation—facial muscles lack intrinsic feedback information (no internal sensory receptors), making it difficult to perform voluntary movements without external guidance. By providing visual feedback through mirrors or EMG biofeedback, your therapist helps you modify muscle activity by:

  • Increasing activation in muscles that should move but don’t
  • Decreasing activation in muscles that shouldn’t move but do

The approach relies heavily on neuroplasticity—your brain’s ability to reorganise itself by forming new neural connections. A 2011 study published in Neurology found that patients undergoing facial neuromuscular retraining experienced significantly better functional improvement than those who didn’t receive this intervention.

Electrical stimulation therapy

Electrical stimulation therapy remains one of the most debated advanced techniques in facial palsy rehabilitation. This approach delivers controlled electrical currents to promote nerve regeneration and preserve muscle mass during recovery.

Regarding effectiveness, results from animal studies appear promising—electrical stimulation reduced recovery time of the eye blink reflex by approximately 26% in one study. Remarkably, even a single session of stimulation proved as effective as multiple treatments for accelerating recovery.

Despite these encouraging findings, the clinical application remains contentious. Some clinicians assert that electrical stimulation improves recovery, yet others worry about potential adverse effects and increased synkinesis risk. Current research suggests electrical stimulation may be most beneficial for:

  • Preventing muscle atrophy in denervated muscles
  • Improving electrophysiological outcomes
  • Reducing recovery time by approximately 30-50%

For optimal results, different current parameters are required for innervated versus denervated muscles—pulse durations of 100-300 microseconds for innervated muscles compared to at least 10 milliseconds for denervated muscles.

Manual therapy and massage

Facial massage plays a critical role in maintaining tissue pliability throughout your recovery process. Regular massage helps keep your face supple as nerves regenerate, potentially reducing stiffness and other side effects.

A small-scale 2020 study published in Complementary Therapies in Clinical Practice found targeted massage techniques significantly improved facial symmetry and muscle function in Bell’s palsy patients over 8 weeks. Typical techniques focus on:

  • Lower facial muscles: Grasping the centre of the lips and moving them into different positions
  • Circular movements to improve circulation
  • Gentle stretching to maintain tissue elasticity

The basic principle behind massage therapy is improving blood circulation, reducing muscle tightness, and supporting nerve healing, particularly when combined with other physical therapy approaches.

Proprioceptive neuromuscular facilitation

Proprioceptive neuromuscular facilitation (PNF) represents another advanced option primarily known for limb rehabilitation but increasingly applied to facial palsy recovery. This technique uses patterns of movement and stretching to improve muscle function and coordination.

The current evidence for PNF in facial palsy treatment is limited but promising. A study examining patients receiving PNF with steroids showed faster clinical recovery (mean recovery time 70 days) compared to those receiving steroids alone (mean recovery time 124 days).

Typically, PNF is combined with other interventions rather than used alone. Studies have investigated PNF together with:

  • Medications (antivirals and corticosteroids)
  • Conventional treatment, including galvanic current stimulation
  • Nerve stimulation

Assessment tools like the House-Brackmann Scale, Synkinesis Assessment Questionnaire, and Facial Disability Index are commonly used to measure progress with PNF treatment.

Plateaued in your recovery? Explore advanced neuromuscular re-education and other techniques with the Best Physiotherapist in Mohali at The Brigit Clinic. Call 📞 0172 - 3137922 to Advance Your Treatment.

Step 6: Supporting Daily Function and Expression

Beyond mastering exercises and advanced techniques, physiotherapy in facial palsy must address daily functional challenges that significantly impact quality of life. Nearly one-third (29%) of patients experience permanent facial function deficits affecting critical activities, creating obstacles that specialised rehabilitation strategies can help overcome.

Speech improvement through physiotherapy

Facial paralysis often compromises speech clarity, especially for sounds requiring lip seal such as ‘b’, ‘p’, ‘m’, ‘v’, and ‘f’ consonants. Studies reveal that patients with unilateral facial palsy demonstrate significantly poorer articulation compared to healthy individuals.

Interestingly, the relationship between palsy severity and speech impacts isn’t straightforward—research indicates no direct correlation between the degree of facial palsy and its effect on communication. This underscores why individualised assessment by a speech-language therapist or physiotherapist with facial rehabilitation expertise remains vital.

Speech therapy typically incorporates:

  • Specific articulation exercises focusing on problematic consonants
  • Compensatory strategies to maximise intelligibility
  • Combined approaches with facial exercises to strengthen relevant muscles

Eating & drinking function recovery

Facial weakness creates substantial challenges during meals. The inability to form a proper lip seal makes containing food and fluids difficult, while weakened cheek muscles allow food to collect on the affected side. These complications often lead patients to avoid eating in social settings.

For improved eating and drinking, consider these practical techniques:

First, support your lower lip with transpore tape (2.5 cm width) positioned to lift toward the outer mouth corner. Cheek taping can likewise provide structural support during the flaccid recovery stage. Additionally, specialised tools like Kapi-cups—thin plastic mugs with cutouts allowing drinking without head-tipping—can dramatically improve fluid intake.

Dietary modifications prove equally important—choosing softer foods, avoiding mixed consistencies (like cereal in milk), and taking smaller bites all contribute to better mealtime experiences.

Eye protection & blinking recovery

Facial nerve paralysis frequently affects tear production and blinking ability, creating a serious risk for corneal damage. Eye protection represents the highest priority during early recovery (first 5 months).

Common eye protection approaches include:

  • Artificial tears are applied hourly to maintain moisture
  • Eye ointments for inflammation and soreness
  • Medical tape or eye patches to prevent drying from air conditioning or fans

For long-term blinking issues, eyelid weights offer a more permanent solution. Made from gold or platinum and implanted into the upper eyelid, these weights help restore proper blinking function. This procedure requires careful planning and precise implementation by facial plastic and oculoplastic surgeons.

Improvement in facial expressions

Facial expressions constitute the foundation of non-verbal communication, with their absence profoundly affecting social interactions. Patients living with incomplete recovery frequently experience psychological distress, depression, and social alienation.

Physiotherapy focuses on restoring expressiveness through neuromuscular retraining techniques using a mirror or EMG biofeedback. As recovery progresses, patients learn to refine control of specific muscle groups responsible for different expressions, gradually rebuilding their non-verbal communication repertoire.

Throughout rehabilitation, remember that improvement varies by individual. Seeking qualified professional guidance ensures you receive appropriate, personalised interventions tailored to your specific functional needs.

Difficulty with speech, eating, or eye closure? We specialise in restoring daily function. Find supportive and effective Physiotherapy in Mohali at our state-of-the-art clinic. Let us help you regain confidence.

Step 7: Home Care and Long-Term Maintenance

Successful facial palsy rehabilitation requires consistent practice at home, long after your supervised therapy sessions end. The daily exercises and self-care routines you perform become fundamental to your long-term recovery.

Daily home exercise routines

Home exercise programs should complement your professional therapy sessions. For optimal results, your therapist will typically prescribe:

  • 3 to 5 specific exercises targeting your affected areas
  • 5 to 10 repetitions of each exercise
  • Practice sessions twice daily

Remember that quality matters more than quantity. Indeed, all movements should be very gentle and performed with extreme care. Forceful attempts with weakened muscles can lead to complications like synkinesis or unwanted facial movements. Only practice exercises at home after you can perform them accurately and recognise when you’re doing them incorrectly.

Massage for facial muscles at home

Facial massage plays a vital role alongside exercises in maintaining healthy, mobile muscles throughout recovery. After learning proper techniques from your therapist, you can perform regular massages to:

  • Keep muscles supple and healthy
  • Lengthen muscles that have become short or tight
  • Improve circulation to support nerve healing

For optimal technique, use your palms and fingertips to massage the sides of your face in an upward motion. Throughout the process, use Vitamin E or jojoba oil to improve gliding motion without causing breakouts. Focus on sweeping motions rather than rubbing, as excessive rubbing may irritate skin and cause inflammation.

Tracking progress and setbacks

Keeping a photographic diary of your recovery provides objective evidence of improvement. As part of your monitoring:

  • Take baseline photos as soon as possible after diagnosis
  • Repeat photos every five days for the first three weeks
  • Continue with photos every two weeks thereafter

This visual documentation helps both you and your healthcare providers assess progress objectively, as daily observation makes subtle changes difficult to notice.

When to revisit your therapist

Schedule a follow-up with your therapist if:

  • You notice no recovery within three months
  • New abnormal movements develop
  • You experience increasing tightness or discomfort
  • You’ve completed your home program but plateaued

Above all, remember that recovery often progresses slowly, hence patience remains essential. Many patients don’t see initial improvement for several months, yet therapy remains effective even when started years after onset.

Need a sustainable home exercise plan? Get a tailored routine from our Physio Clinic in Mohali to ensure you practice correctly and safely between sessions. Your long-term recovery is our priority.

Step 8: Measuring Success and Adjusting Treatment

Tracking progress objectively forms the cornerstone of effective facial palsy rehabilitation, allowing both patient and therapist to make informed decisions about treatment adjustments.

Using outcome measures like FDI and Sunnybrook

Measuring facial palsy improvement requires standardised assessment tools. The House-Brackmann Scale (HBS) remains the most commonly used method for recording functional recovery, appearing in numerous studies. The Sunnybrook Facial Grading System offers greater sensitivity by evaluating resting symmetry, movement symmetry, and synkinesis on a 0-100 scale. Notably, physiotherapists often prefer this system specifically for its detailed assessment of synkinesis.

Patient-reported outcomes provide equally vital information. The Facial Disability Index (FDI) measures both physical function (FDIP) and social/well-being elements (FDIS). These scores help quantify quality of life impacts that clinical grades might miss.

Recovery of facial symmetry over time

Facial symmetry typically improves gradually with appropriate physiotherapy. Patients using mirror book therapy show approximately 25% increase in Facial Grading System scores, 21.6% improvement in FDIP, and 24.5% increase in FDIS. Voluntary movement scores specifically demonstrate significant increases between the 6th and 12th months of treatment.

Adapting therapy for chronic cases

Remarkably, facial rehabilitation benefits patients regardless of age, gender, or when treatment begins. For chronic cases, treatment modifications based on regular reassessment become essential. Surface-based measurement techniques can detect subtle symmetry improvements, guiding therapy adjustments even in long-standing cases. As treatment progresses, outcome measures help identify plateaus requiring fresh therapeutic approaches.

Want to accurately track your recovery? Our Physio Clinic Near Me in Mohali uses standardised tools like the Sunnybrook scale to measure success and adjust your plan for the best outcomes. Get a Progress Evaluation Today.

Conclusion

Facial palsy rehabilitation represents a journey rather than a quick fix. Though each person’s path to recovery differs, physiotherapy undoubtedly plays a crucial role in restoring both function and confidence. Throughout this guide, we’ve explored everything from recognising symptoms to implementing advanced rehabilitation techniques.

Patience remains essential during recovery. Most patients see significant improvement within 3-6 months, but complete rehabilitation might take longer, especially for the 30% who don’t recover spontaneously. Your commitment to consistent practice makes all the difference in your outcome.

Actually, physiotherapy for facial palsy works best as a comprehensive approach. Combining core exercises, neuromuscular re-education, and specialised techniques like mirror therapy or EMG biofeedback maximises your chances of regaining facial symmetry and function. These evidence-based approaches help reestablish neural pathways and muscle coordination through neuroplasticity.

Beyond physical recovery, physiotherapy addresses psychological aspects of facial palsy. Many patients experience social anxiety and depression due to changes in appearance and function. Consequently, rehabilitation must target both physical restoration and emotional well-being.

Remember that support exists regardless of when your facial palsy began. Research shows benefits from therapy even years after onset, so previous disappointments needn’t determine your future progress. Your physiotherapist can adjust your treatment plan as needed based on objective measurements and your personal goals.

Facial palsy might temporarily change how you interact with the world, but with proper physiotherapy, dedication to home exercises, and professional guidance, you can achieve significant functional improvement and regain your confidence. This step-by-step approach provides the roadmap—now your journey toward recovery can begin.

Key Takeaways

This comprehensive guide reveals evidence-based strategies for facial palsy recovery that can significantly improve outcomes when applied systematically.

• Early intervention matters most: Seek medical attention within 72 hours of symptom onset – patients receiving early steroid treatment achieve 83% full recovery versus only 72% without treatment.

• Quality over quantity in exercises: Perform facial exercises 3-4 times daily with gentle, controlled movements – forceful attempts can cause complications like synkinesis and unwanted facial movements.

• Mirror therapy accelerates recovery: Visual feedback through mirror exercises stimulates brain regions for movement and significantly improves facial symmetry while reducing long-term complications.

• Home practice determines success: Consistent daily exercise routines and facial massage maintain muscle health and support nerve healing throughout the recovery process.

• Recovery takes patience but works: While 70% recover naturally within 3-6 months, physiotherapy benefits patients regardless of age or when treatment begins – even years after onset.

The key to successful facial palsy rehabilitation lies in combining professional guidance with dedicated home practice, using evidence-based techniques that address both physical function and emotional well-being for comprehensive recovery.

FAQs

Q1. How long does it typically take to recover from facial palsy with physiotherapy?

A1. Recovery time varies, but most patients see significant improvement within 3-6 months of starting physiotherapy. Complete rehabilitation may take longer, especially for the 30% who don’t recover spontaneously. Consistent practice and patience are key to achieving the best outcomes.

Q2. What are some core exercises for facial muscle recovery?

A2. Core exercises include gentle movements targeting specific muscle groups, such as lifting eyebrows, closing eyes tightly, wrinkling the nose, and puckering lips. These should be performed 3-4 times daily in short sessions, with up to 30 repetitions per exercise, while monitoring in a mirror to ensure proper technique.

Q3. Can physiotherapy help with speech and eating difficulties caused by facial palsy?

A3. Yes, physiotherapy can significantly improve speech clarity and eating function. Techniques include specific articulation exercises, compensatory strategies for intelligibility, and methods to support lip seal and cheek muscles during meals. Specialised tools and dietary modifications may also be recommended.

Q4. Is electrical stimulation effective in facial palsy treatment?

A4. The effectiveness of electrical stimulation in facial palsy treatment is debated. Some studies suggest it can reduce recovery time by 30-50% and help prevent muscle atrophy. However, its clinical application remains controversial due to potential risks of adverse effects and increased synkinesis.

Q5. How can I track my progress during facial palsy rehabilitation?

A5. Progress can be tracked through standardised assessment tools like the House-Brackmann Scale and Sunnybrook Facial Grading System. Additionally, keeping a photographic diary with regular photos every few weeks provides visual evidence of improvement. Patient-reported outcome measures like the Facial Disability Index also help quantify quality of life impacts.

About Dr. Aayushi – Best Physiotherapist in Mohali

Dr. Aayushi is a highly skilled and compassionate physiotherapist dedicated to helping patients overcome the challenges of facial palsy. With specialised training in neurological rehabilitation and a deep understanding of facial neuromuscular retraining, she is recognised as a leading Physiotherapist in Mohali. At The Brigit Clinic, Dr. Aayushi combines evidence-based techniques, such as mirror therapy and EMG biofeedback, with a personalised touch to create effective treatment plans that restore both function and confidence. Her patient-centric approach ensures that every individual receives the dedicated care and support they need throughout their recovery journey, making her the preferred choice for anyone seeking the Best Physiotherapist in Mohali.


Book an Appointment today - 
📞 0172 - 3137922 | 🌐 Read Reviews | 📍 Get Directions
Ankylosing Spondylitis Explained: From Diagnosis to Daily Management

Ankylosing spondylitis affects approximately 1.7 million adults in the United States, with a prevalence rate of 0.2-0.5% of the population. Unlike common backaches that come in short, painful spells, the pain from this chronic inflammatory condition is typically long-lasting and can significantly impact one’s quality of life. Most people develop ankylosing spondylitis during their late teens or early twenties, with about 80% of patients experiencing symptoms before age 30.

When examining genetic factors, more than 95% of Caucasian individuals with ankylosing spondylitis carry the HLA-B27 gene. The condition also shows a gender disparity, occurring twice as frequently in men as in women. While there’s no cure for ankylosing spondylitis, early detection and appropriate treatment can help manage symptoms and potentially slow disease progression. In this comprehensive guide, we’ll explore everything from diagnosis methods like HLA-B27 testing and x-ray findings to various management strategies, including medications, physical therapy, and surgical options for those with advanced spinal changes.

Understanding Ankylosing Spondylitis

Ankylosing spondylitis (AS) belongs to a family of inflammatory diseases known as spondyloarthritis, which primarily affects the spine and sacroiliac joints. This condition is characterised by its autoimmune nature – essentially, your immune system mistakenly attacks your own body instead of protecting it.

What is autoimmune arthritis of the spine?

Ankylosing spondylitis is fundamentally an inflammatory disease of the axial skeleton. Unlike typical wear-and-tear arthritis, AS is driven by chronic inflammation that can eventually lead to new bone formation and fusion of vertebrae. Although experts haven’t pinpointed the exact cause, genetic factors play a crucial role – specifically, mutations in genes like human leukocyte antigen-B (HLA-B27). Research shows that over 90% of white individuals with AS carry this mutated gene.

The condition is generally considered more autoinflammatory than autoimmune, with the innate immune system playing a central role in its development. However, emerging research suggests AS might actually represent a combination of both autoinflammatory and autoimmune processes.

How AS affects the sacroiliac joints and spine

AS typically begins with inflammation in the sacroiliac joints, where your spine connects to your pelvis. These large joints are used whenever you move or shift your hips. The inflammation causes pain and stiffness, particularly noticeable in the lower back. As the disease progresses, this inflammation can spread upward along the spine.

Eventually, in severe cases, the ongoing inflammation triggers the body’s healing response, leading to new bone formation. This process can cause vertebrae to fuse, creating the characteristic “bamboo spine” appearance visible on X-rays. This fusion reduces spine flexibility and may result in a hunched posture.

Beyond the spine, AS can affect other joints such as the shoulders, hips, and knees. Moreover, approximately 25-35% of individuals develop acute anterior uveitis (eye inflammation), and up to 50% experience inflammatory bowel disease.

Difference between AS and non-radiographic axial spondyloarthritis

AS and non-radiographic axial spondyloarthritis (nr-axSpA) represent two ends of the same disease spectrum. The key distinction lies in imaging results – particularly X-rays of the sacroiliac joints.

In AS (also called radiographic axial spondyloarthritis), damage to the sacroiliac joints is clearly visible on X-rays. Conversely, nr-axSpA patients show similar symptoms but without definitive X-ray evidence of sacroiliitis. Nevertheless, MRI technology might reveal active inflammation in nr-axSpA patients even before changes appear on X-rays.

Interestingly, these subtypes show demographic differences. AS affects males more frequently (about 70.4% of cases), whereas nr-axSpA shows a more balanced gender distribution (males account for approximately 46.5%). Furthermore, HLA-B27 prevalence is lower in nr-axSpA patients (54.3%) compared to AS patients (92.7%).

Is your back pain inflammatory? Don't ignore persistent stiffness. Consult with an experienced Back Pain Doctor in Mohali at The Brigit Clinic for an accurate diagnosis. Book Your Appointment Today!

Recognising the Symptoms Early

Early detection of ankylosing spondylitis starts with recognising its distinctive symptoms. The signs often develop gradually over months or years and may fluctuate in intensity.

Inflammatory back pain symptoms to watch for

The hallmark of ankylosing spondylitis is inflammatory back pain, which differs significantly from mechanical back pain. Pain typically begins in early adulthood before age 40 and develops gradually rather than suddenly. Initially, symptoms might come and go for weeks or months at a time.

What makes this pain unique:

  • Worsens after prolonged rest or sitting
  • Improves with physical activity
  • Often most severe in the early morning or during the night
  • Frequently causes stiffness lasting more than an hour after waking

Notably, this pattern reverses what we see in typical back pain, where rest usually provides relief and activity worsens symptoms.

Sacroiliac joint inflammation and stiffness

Sacroiliitis—inflammation of the sacroiliac joints where your spine connects to your pelvis—is frequently the first sign of ankylosing spondylitis. This inflammation causes pain in the lower back and buttock areas that can radiate to the hips, thighs, and sometimes legs.

The pain from sacroiliitis may feel suddenly sharp and stabbing or present as a constant dull ache. Many patients report pain that worsens when turning or rotating their hips. This discomfort can significantly affect daily activities, especially sitting for extended periods.

Fatigue, eye inflammation, and other systemic signs

Beyond joint symptoms, ankylosing spondylitis often affects multiple body systems. Extreme fatigue affects many patients regardless of how much they rest. Additionally, about 25-35% of individuals develop uveitis—inflammation of the eye’s iris—causing redness, pain, blurred vision, and light sensitivity.

Other systemic manifestations may include:

  • Inflammatory bowel disease (affecting up to 50% of individuals)
  • Unexplained weight loss
  • Skin rashes
  • Shortness of breath

Progressive spinal fusion and posture changes

If left untreated, ongoing inflammation triggers the body’s healing response, leading to new bone formation between vertebrae. This process, called spinal fusion, creates the characteristic “bamboo spine” appearance visible on X-rays.

As the disease advances, postural changes become increasingly apparent. The spine may develop increased kyphosis (forward curve), with compensatory changes in the lower body. The progressive fusion limits mobility and can eventually restrict chest expansion, affecting breathing capacity.

Experiencing morning back stiffness or unexplained fatigue? Early intervention is key. Visit the leading Ortho Clinic in Mohali for a comprehensive evaluation. Call us at +91 87250 11661.

Diagnosis and Testing Methods

Diagnosing ankylosing spondylitis often presents significant challenges, as the condition develops slowly with no definitive single test to confirm its presence.

Early detection of ankylosing spondylitis

Obtaining an early diagnosis typically requires a combination of clinical assessment, imaging, and laboratory tests. The modified New York Criteria remains the most commonly used diagnostic framework, requiring both clinical symptoms and radiographic evidence of sacroiliitis. Consequently, many patients experience a delay of 7-10 years between symptom onset and formal diagnosis.

Role of HLA-B27 testing in diagnosis

While approximately 90-95% of ankylosing spondylitis patients test positive for HLA-B27, this genetic marker alone cannot confirm diagnosis. Indeed, only 1-5% of people carrying this gene variant actually develop the condition. The test primarily serves as a supporting factor in diagnosing suspected cases, given that 7.5% of white Americans carry HLA-B27 without developing symptoms.

X-ray findings and radiographic changes

X-rays represent the traditional gold standard for assessing structural changes in ankylosing spondylitis. Key radiographic findings include bilateral sacroiliitis, vertebral “squaring,” syndesmophytes (vertical bony outgrowths), and in advanced cases, the characteristic “bamboo spine” appearance. For reliable assessment of spinal progression, an observation period of at least 2 years is recommended.

MRI and blood tests for inflammation markers

MRI has revolutionised early diagnosis by detecting inflammatory changes before they become visible on X-rays. Blood tests for inflammation—including erythrocyte sedimentation rate (ESR) and C-reactive protein (CRP)—often show elevated levels, though these markers may be normal in up to half of patients. Unlike other inflammatory arthritis conditions, ankylosing spondylitis patients sometimes show minimal blood inflammation despite significant symptoms.

Confused by your symptoms and test results? Get a clear diagnosis and personalised treatment plan from the Back Pain Specialist in Mohali
Visit Our Google My Business Page to See Patient Reviews

Treatment and Management Options

Treatment options for ankylosing spondylitis have expanded tremendously, offering hope for symptom management and disease control. While there’s no cure, proper treatment can help most patients lead active lives.

NSAIDs for ankylosing spondylitis pain relief

NSAIDs remain the cornerstone first-line treatment for AS. These medications effectively reduce inflammation and pain while improving function. Studies show all NSAIDs significantly outperform placebo in reducing pain severity. Etoricoxib ranks as the most effective NSAID for AS patients. However, these medications carry risks – particularly gastrointestinal issues with diclofenac and naproxen showing significantly higher rates of GI events compared to placebo.

DMARDs and biologics: slowing disease progression

For patients who don’t respond adequately to NSAIDs, disease-modifying treatments offer hope. TNF inhibitors dramatically improve symptoms by blocking the TNF cytokine, a key inflammation driver. Long-term TNF inhibitor use may reduce radiographic progression in AS patients.

Newer biologics include IL-17 inhibitors (secukinumab, ixekizumab, bimekizumab), which effectively target another inflammatory pathway. JAK inhibitors like tofacitinib and upadacitinib, taken orally rather than by injection, represent the latest treatment advance.

Corticosteroid injection for flare-ups

Corticosteroid injections can temporarily relieve inflammation in specific joints. Pain relief typically lasts several months. Side effects may include short-term pain flares, facial flushing, and blood sugar increases. Doctors typically limit injections to three times yearly in the same joint, with at least three months between treatments.

Physical therapy and orthopaedic bracing

Physical therapy stands as a crucial element in AS management. Regular exercises help reduce stiffness, improve posture, decrease pain, strengthen muscles, and enhance flexibility. Physical therapists can design personalised programs incorporating core strengthening, flexibility exercises, and deep breathing techniques.

Orthopaedic bracing provides support and stability for affected joints. Properly fitted braces can reduce pain, improve stability, and enhance function.

Surgical options: hip replacement and spinal osteotomy

When conservative treatments fail, surgical intervention may be necessary. Total hip arthroplasty effectively alleviates pain and improves function in AS patients with severe hip involvement. For significant spinal deformities, osteotomy procedures can correct posture and restore sagittal balance.

Disability reduction and prevention of joint fusion

The ultimate goal of all treatments is to prevent disability and joint fusion. Early intervention with appropriate medications, consistent physical therapy, and lifestyle modifications offers the best chance at maintaining function and quality of life.

Explore advanced Back Pain Treatment in Mohali tailored to your needs. From NSAIDs to modern therapies, find relief at The Brigit Clinic. Explore Your Treatment Options

Conclusion

Ankylosing spondylitis presents unique challenges for both patients and healthcare providers. Though no cure exists currently, early detection coupled with comprehensive treatment significantly improves quality of life. Understanding the distinctive symptoms—particularly inflammatory back pain that improves with activity rather than rest—helps identify this condition before irreversible damage occurs.

After diagnosis, many treatment options become available to manage symptoms effectively. NSAIDs generally serve as first-line therapy, while biologics and JAK inhibitors offer hope for those with inadequate response. Additionally, regular physical therapy plays a crucial role in maintaining spinal mobility and function throughout the disease course.

Living with ankylosing spondylitis certainly requires adjustments, but advances in treatment have transformed the outlook for most patients. The combination of medication, exercise, and lifestyle modifications allows many individuals to lead active, fulfilling lives despite their diagnosis. Most importantly, proactive management helps prevent the most severe complications like spinal fusion and significant disability.

For anyone experiencing persistent lower back pain with morning stiffness, seeking medical evaluation promptly might make all the difference. The journey from diagnosis to daily management may seem daunting at first, but with proper support and treatment, the path forward becomes much clearer. Remember that each person’s experience with ankylosing spondylitis differs, and finding the right treatment approach often requires patience and partnership with healthcare providers.

Key Takeaways

Understanding ankylosing spondylitis is crucial for early detection and effective management of this chronic inflammatory condition that affects millions worldwide.

• Early recognition saves mobility: Inflammatory back pain that worsens with rest but improves with activity signals AS, unlike typical back pain patterns.

• Genetic testing provides clues: Over 90% of AS patients carry the HLA-B27 gene, but only 1-5% of carriers develop the condition.

• Treatment prevents fusion: NSAIDs, biologics, and consistent physical therapy can slow disease progression and prevent irreversible spinal fusion.

• Exercise is medicine: Regular physical therapy and movement are essential for maintaining spinal flexibility and reducing long-term disability.

• Early diagnosis matters: Most patients wait 7-10 years for diagnosis, but prompt treatment significantly improves quality of life outcomes.

The key to successful AS management lies in recognising symptoms early, pursuing comprehensive treatment, and maintaining an active lifestyle. While there’s no cure, modern treatments allow most patients to lead fulfilling lives when properly managed.

FAQs

Q1. What are the early signs of ankylosing spondylitis?

A1. Early signs include persistent lower back pain that improves with activity, morning stiffness lasting over an hour, and pain in the sacroiliac joints. Some people may also experience fatigue, eye inflammation, and other systemic symptoms.

Q2. How is ankylosing spondylitis diagnosed?

A2. Diagnosis involves a combination of clinical assessment, imaging tests (X-rays and MRI), and blood tests. Doctors look for inflammatory back pain symptoms, radiographic evidence of sacroiliitis, and may test for the HLA-B27 gene, which is present in most patients with AS.

Q3. What treatment options are available for ankylosing spondylitis?

A3. Treatment options include NSAIDs for pain relief, biologics like TNF inhibitors to slow disease progression, physical therapy to maintain mobility, and, in some cases, corticosteroid injections or surgery for severe joint damage.

Q4. Can ankylosing spondylitis be cured?

A4. There is no cure for ankylosing spondylitis, but early detection and appropriate treatment can effectively manage symptoms and potentially slow disease progression, allowing many patients to lead active lives.

Q5. How does ankylosing spondylitis differ from typical back pain?

A5. Unlike typical back pain that improves with rest, ankylosing spondylitis pain often worsens with inactivity and improves with exercise. Pain is also typically more persistent, accompanied by morning stiffness, and often starts before age 40.

Ready to take the next step towards managing your AS? Schedule a consultation with the Best Back Pain Doctor in Mohali, Dr. Manu Mengi. Call +91 87250 11661 or visit us at SCO – 41, Sector - 80, Mohali.

About Dr. Manu Mengi – Best Ortho Doctor in Mohali

Dr. Manu Mengi is a renowned and trusted name in orthopedics, dedicated to providing exceptional care for patients with complex joint and spine conditions like Ankylosing Spondylitis. With extensive experience and a patient-centric approach, he is committed to accurately diagnosing the root cause of pain and creating effective, personalised management plans. At The Brigit Clinic, one of the leading Orthopedic Clinics in Mohali, Dr. Mengi utilises the latest advancements in medical science to help patients reduce pain, improve mobility, and enhance their quality of life. His expertise makes him the preferred choice for anyone seeking the Best Ortho Doctor in Mohali.

Book an Appointment today - 
📱 +91 87250 11661 | 🌐 Read Reviews |📍 Get Directions


Orthopedic Complications in Diabetic Patients

Diabetic Bone & Joint Problems: Orthopedic Risks & Solutions

Diabetes & bone health concerns will significantly affect more people in the coming years, with projections showing diabetes cases increasing from 285 million in 2010 to a staggering 439 million by 2030. This growing health crisis not only impacts blood sugar management but also creates serious orthopaedic complications that can dramatically reduce your quality of life. If you’re seeking expert care, Dr. Manu Mengi, renowned as the Best Orthopedic Doctor in Mohali, emphasises early intervention for diabetic patients at his Ortho Clinic in Mohali.

If you’re living with diabetes, your risk for developing musculoskeletal disorders increases substantially. Diabetic patients face a seven times higher likelihood of surgical site infections, experience delayed fracture healing, and account for 85% of all non-traumatic amputations. Furthermore, your chances of developing hip fractures increase 1.4-1.8 fold with type 2 diabetes and 6-7 fold with type 1 diabetes. The financial burden is equally concerning—diabetes-related healthcare expenditures reached $376 billion in 2010 and are expected to exceed $490 billion by 2030.

Throughout this article, you’ll discover the complex relationship between diabetes and orthopedic health, common complications like Charcot foot and Dupuytren’s contracture, and essential strategies to protect your musculoskeletal system while managing your diabetes.

Understanding How Diabetes Affects the Musculoskeletal System

The relationship between diabetes and musculoskeletal issues stems from complex biochemical processes that affect your entire body. Diabetes doesn’t just impact your blood sugar—it fundamentally alters how your bones, muscles, joints, and connective tissues develop, maintain, and repair themselves.

Types of Diabetes and their Orthopedic Implications

Type 1 and Type 2 diabetes affect your skeletal system in markedly different ways. With Type 1 diabetes (T1DM), the absolute lack of insulin and low insulin-like growth factor 1 (IGF1) levels suppress the development of bone-forming osteoblasts. This inhibits proper skeletal growth during youth, preventing adequate bone mass accumulation. Consequently, people with T1DM face a staggering 6-7 fold increase in hip fracture risk compared to non-diabetic individuals.

In contrast, Type 2 diabetes (T2DM) presents a paradoxical situation. Despite typically having higher bone mineral density (BMD) than non-diabetics, T2DM patients still experience a 1.4-1.8 fold increased risk of hip fractures. This occurs because T2DM negatively affects bone quality rather than quantity. Advanced stages of T2DM combine multiple detrimental factors—insulinopenia, hyperglycemia, advanced glycation end products (AGEs), chronic inflammation, and microvascular disease—that collectively compromise bone architecture and strength.

Notably, certain musculoskeletal complications appear more frequently in specific diabetes types. For instance, diffuse idiopathic skeletal hyperostosis (DISH) occurs more commonly in Type 2 diabetes, particularly in obese patients, with prevalence rates of 13-49% compared to just 1.6-13% in the general population.

Role of Insulin Resistance in Bone and Joint Health

Insulin resistance—the key pathology underlying Type 2 diabetes—significantly impacts your bone strength. Research shows that greater insulin resistance correlates with lower femoral neck strength relative to load, with every doubling of insulin resistance associated with a 0.34 to 0.40 standard deviation decrease in bone strength indices.

Interestingly, it’s hyperinsulinemia (high insulin levels) rather than hyperglycemia (high blood sugar) that primarily drives this negative effect on bone quality. Although insulin typically increases bone mineral density through skeletal loading effects, insulin resistance prevents this beneficial adaptation. Therefore, despite having a higher body weight that should strengthen bones, people with insulin resistance don’t gain the expected skeletal benefits from their increased mass.

The relationship extends beyond bone density—insulin resistance also impacts joint health. Eight out of ten Type 2 diabetes patients likely experience musculoskeletal complications, with obesity being a common denominator for both conditions.

Impact of Hyperglycemia on Immune and Healing Response

Chronic high blood sugar profoundly disrupts your body’s healing and immune functions through several mechanisms:

  • Impaired inflammation control: Hyperglycemia increases pro-inflammatory cytokines like TNF-α, interleukin-1β, and interleukin-6, creating a state of chronic low-grade inflammation.
  • Compromised immune function: High blood sugar inhibits interleukin-1 release from macrophages, impairs phagocytosis, and diminishes oxygen radical production from neutrophils, collectively weakening your immune response.
  • Delayed tissue repair: Hyperglycemia reduces important cytokine production and decreases new blood vessel formation at fracture sites, slowing healing.

Moreover, hyperglycemia leads to the formation of advanced glycation end products (AGEs) that cross-link with collagen fibres in both trabecular and cortical bone. This makes bones more brittle and deteriorates their post-yield properties without necessarily changing bone mineral density. Additionally, AGEs directly interfere with osteoblast function, inhibiting proper bone formation.

These metabolic disruptions help explain why diabetic patients show higher rates of delayed union and non-union during fracture healing, with healing time potentially prolonged by up to 87%.

Common Orthopedic Complications in Diabetic Patients

Living with diabetes involves managing numerous musculoskeletal complications beyond blood sugar control. Prolonged hyperglycemia damages tissues throughout your body, leading to several distinct orthopedic conditions that can severely impact mobility and quality of life.

Charcot joint and Diabetic Foot Ulcers

Charcot neuroarthropathy, often called Charcot foot, represents one of the most serious diabetes-related orthopedic emergencies. This condition occurs when undetected injuries to foot bones lead to joint deterioration due to nerve damage, a common diabetes complication primarily affecting the feet.

The earliest sign is typically swelling, which can occur without obvious injury. Redness and warmth frequently follow, often mistaken for infection. As Charcot foot progresses, joints collapse and deform, creating a characteristic “rocker-bottom” foot shape.

What makes Charcot foot particularly dangerous is that 50% of patients who develop ulcers face amputation risk, versus only 10% without ulcers. Indeed, 85% of non-traumatic amputations stem from diabetes. Early detection and limiting weight-bearing activities are crucial for slowing progression.

Osteoarthritis and Joint Stiffness

Type 2 diabetes increases osteoarthritis (OA) risk beyond what would be expected from obesity alone. The link stems primarily from hyperglycemia-induced advanced glycation end products (AGEs), which accumulate in cartilage, trigger inflammation, and accelerate joint degradation.

Specifically, AGEs activate chondrocytes and synoviocytes to produce pro-inflammatory mediators. Studies show diabetic OA patients have higher levels of matrix metalloproteinases and experience stronger local inflammation with pronounced synovitis.

Joint pain is typically worse in diabetic patients with OA, especially in knee and hand joints. A recent large cohort study confirmed that increased OA pain is a specific feature of diabetes, not merely a result of increased OA progression or higher BMI.

Frozen Shoulder and Limited Joint Mobility

Frozen shoulder (adhesive capsulitis) occurs seven times more frequently in diabetic patients than in the general population. This painful condition limits shoulder motion and progresses through three distinct phases: freezing (painful with decreasing motion), frozen (less painful but stiffer), and thawing (gradual improvement).

Limited joint mobility syndrome (LJMS), another common complication, initially affects small joints in hands and feet but can eventually impact all joints, including shoulders, hips, and spine. The “prayer sign” and “tabletop sign” are clinical tests strongly supporting diagnosis.

Research using three-dimensional kinematic analysis found diabetic patients show 11-16° decreased glenohumeral external rotation and 10-14° decreased humerothoracic elevation. Further, external rotation with the arm abducted was reduced by 20-22° in diabetic patients compared to controls.

Dupuytren’s Contracture and Hand Deformities

Dupuytren’s contracture creates a progressive deformity where fingers bend toward the palm due to thickening and scarring of connective tissue. Notably, patients with Type 2 diabetes have a 1.641 times higher prevalence of this condition compared to those with Type 1 diabetes.

This difference is likely related to glycosylation—a process where glucose molecules attach to proteins, making collagen sticky and restricting movement. Among diabetic patients, those using insulin show higher Dupuytren’s prevalence than those taking metformin.

DISH and Spinal Complications

Diffuse idiopathic skeletal hyperostosis (DISH) involves abnormal bone growth along the spine’s anterolateral aspect, affecting at least four contiguous vertebrae. This condition occurs disproportionately in diabetic patients, with a 40% prevalence in obese type 2 diabetics compared to only 13% in the general population.

DISH causes spinal stiffness and can lead to unstable spine fractures even with minimal trauma. Meta-analysis confirms a significant association between DISH and carbohydrate metabolism disorders, potentially related to lower serum levels of natural osteogenesis inhibitor Dickkopf-1 (DKK-1).

Bone and Tendon Healing Challenges in Diabetes

Beyond common complications, diabetes creates profound challenges in healing processes that can significantly extend your recovery time following injuries. This section explores how diabetes alters your body’s natural repair mechanisms.

Delayed Bone Healing in Diabetics

Your fracture risk increases markedly with diabetes, 6-7 fold with Type 1 diabetes and 1.4-1.7 fold with Type 2 diabetes. Subsequently, these fractures heal more slowly. Research shows healing time in diabetic patients is prolonged by a staggering 87%, often resulting in prolonged disability and reduced mobility.

The mechanisms behind this delayed healing include insulin insufficiency, hyperglycemia, and oxidative stress—all of which reduce osteoblast differentiation, increase osteoclast activity, and alter chondrocyte apoptosis. Typically, these disruptions interfere with the normal transition from cartilage to bone during the healing process.

Fracture Healing in Diabetes: What Research Shows

Clinical studies reveal diabetic patients face a 3.4-fold higher risk of fracture complications, including delayed union, non-union, and redislocation. To clarify, diabetes damages multiple phases of the healing process. The inflammatory phase becomes dysregulated, decreasing the availability of cytokines and growth factors necessary for repair.

Animal studies demonstrate that diabetic fracture healing shows decreased bone apposition and mineralisation. Likewise, researchers observed diabetic mice exhibit increased callus adiposity and hampered biomechanical properties. First thing to remember is that these changes reflect an altered balance of stem cell differentiation, favouring adipocytes over osteoblasts in the fracture callus.

Tendon Abnormality in Diabetic Patients

As a result of metabolic disturbances, your risk for tendon problems increases threefold with diabetes. Unfortunately, these conditions prove more treatment-resistant than in non-diabetic patients. Common manifestations include:

  • Achilles tendinopathy
  • Rotator cuff syndrome
  • Lateral epicondylitis (tennis elbow)
  • Trigger finger

Approximately 5% of diabetic patients develop tendinopathy annually, with risk increasing for those on insulin and with longer disease duration. Diabetes-induced hyperglycemia increases the expression of inflammatory factors that impair tendon healing through elevated reactive oxygen species and apoptotic cells.

Impact of Glycemic Control on Bone Healing

Important to realise, glycemic control significantly influences healing outcomes. Studies consistently show that longer disease duration and worse glycemic control correlate with higher fracture risks. Up to the present time, research demonstrates elevated haemoglobin A1c levels 3-6 months after rotator cuff repair surgery are directly associated with increased re-tear rates.

Conversely, diabetic patients with effective perioperative glycemic control show re-tear rates comparable to non-diabetic patients, highlighting the critical importance of blood sugar management. Treatment with systemic insulin can reverse impaired fracture healing, suggesting insulin signalling plays a necessary role in repair. Nevertheless, local insulin application to fracture sites shows even more promise by directly stimulating cell proliferation.

Surgical Risks and Outcomes in Diabetic Patients

Undergoing orthopaedic surgery with diabetes presents unique challenges that extend far beyond standard surgical risks. Understanding these factors can help you prepare for procedures and improve your chances of successful outcomes.

Diabetes & Orthopedic Surgery Risks

Orthopedic surgery involving diabetes carries substantial complications across all subspecialties, including foot and ankle, upper extremity, adult reconstructive, paediatrics, spine surgery, and sports medicine. Patients with diabetes utilise approximately 45% more hospital bed days compared to non-diabetic patients. Furthermore, non-cardiac surgeries show significantly higher perioperative mortality rates among diabetic patients. The risk of cardiovascular complications such as coronary artery disease, hypertension, and cerebrovascular accidents increases 100%-300% in patients with diabetes.

Surgical Outcomes in Diabetic Orthopedic Patients

Surgical outcomes differ remarkably between diabetic types. Type 1 diabetes patients experience longer hospital stays and higher costs than those with Type 2 after hip and knee arthroplasty. Both surgical complications (haemorrhage and wound infection) and non-surgical complications (heart attack, pneumonia, urinary infections, and death) occur more frequently in Type 1 diabetic patients. Interestingly, well-controlled diabetic patients without comorbidities demonstrate similar outcomes to non-diabetic patients.

Peripheral Vascular Disease & Orthopedic Surgery

Peripheral vascular disease (PVD) dramatically complicates orthopedic surgery. Macrovascular disease often results in atherosclerosis that impedes wound healing. Once diabetic foot ulcers develop (in 15%-25% of diabetic patients during their lifetime), infection risk rises dramatically. Severe diabetic foot infections requiring transtibial amputation occur in nearly 20% of cases. Atherosclerosis affecting osseous structures can weaken bones, especially among patients with diabetic nephropathy and vitamin D deficiency.

Infection and Implant Failure Risks

Infection rates increase substantially with hyperglycemia. Patients showing serum glucose above 220 mg/dL experienced a 25% overall infection rate. Perioperative glucose exceeding 220 mg/dL increases infection likelihood sevenfold in orthopedic trauma patients. Notably, patients with complicated diabetes (neuropathy, PAD or nephropathy) face seven times higher surgical site infections compared to non-diabetic patients. Hyperglycemia simultaneously increases pulmonary embolism risk by 200% after joint replacement procedures.

Strategies for Prevention and Management

Managing orthopedic complications requires proactive strategies that extend beyond basic diabetes care. Proper interventions can significantly reduce your risk of serious musculoskeletal issues and improve surgical outcomes.

Importance of Glycemic Control Before Surgery

Preoperative glycemic control is essential for minimising surgical complications. Studies show that HbA1c levels above 7.0% are associated with higher rates of surgical site infections in spinal surgery (35.3% compared with 0.0%). Most orthopedic surgeons recommend an HbA1c target below 8% for elective procedures. For trauma patients where surgery cannot be delayed, comanagement with internal medicine can help rapidly reduce blood glucose levels.

Beyond preoperative optimisation, maintaining glycemic control throughout hospitalisation is crucial. Current guidelines recommend pre-prandial glucose levels below 140 mg/dL and random glucose below 180 mg/dL for non-ICU patients. In the ICU setting, serum glucose levels should be maintained below 150 mg/dL.

Physical Therapy and Lifestyle Interventions

Physical therapy plays a vital role in managing diabetic musculoskeletal complications. Recommended exercises include:

  • Strength training to improve muscle function and reduce neuropathic pain
  • Aerobic activity for cardiovascular health and glycemic control
  • Balance and posture training for falls prevention (particularly important as diabetes increases fall risk by 200-300%)
  • Flexibility exercises to improve joint mobility

Regular physical activity reduces diabetes risk by approximately 30%. In fact, brisk walking for at least 2.5 hours weekly is associated with reduced type 2 diabetes risk regardless of body mass index.

Monitoring for Neuropathy and Vascular Issues

Regular foot examinations are crucial since 85% of non-traumatic amputations among diabetic patients begin with chronic foot ulcers. Screening should include thorough visual inspection for calluses, blisters, and redness—all precursors to skin breakdown.

Additionally, vascular assessment should evaluate peripheral artery disease, a component cause in approximately one-third of foot ulcers. Palpate the dorsalis pedis and tibialis posterior arteries, and check capillary refill (refill exceeding 4.5 seconds indicates compromised circulation).

When to consider surgical intervention

Surgical intervention becomes necessary when conservative measures fail or complications threaten limb viability. Prior to orthopedic surgery, vascular assessment is essential—revascularisation surgery should systematically precede orthopedic procedures in cases of critical vascular insufficiency.

For diabetic foot complications, prophylactic surgery to limit ulceration risks should be approached cautiously and only when justified. Acute diabetic foot is considered a medical emergency requiring immediate empiric antibiotics.

Conclusion

Living with diabetes undoubtedly presents significant orthopedic challenges that extend far beyond blood sugar management. Throughout this article, we’ve examined how diabetes fundamentally alters your musculoskeletal system through complex biochemical mechanisms. Certainly, the statistics paint a concerning picture—diabetes increases surgical site infection risk sevenfold, delays fracture healing by up to 87%, and accounts for 85% of all non-traumatic amputations.

Effective management of orthopedic complications requires a comprehensive approach. First and foremost, maintaining tight glycemic control stands as your primary defence against serious complications. Research conclusively demonstrates that well-controlled diabetic patients without comorbidities show surgical outcomes similar to non-diabetic individuals. Additionally, regular physical activity not only improves your overall diabetic control but also specifically strengthens bones and muscles while reducing fall risk.

The relationship between diabetes and orthopedic health highlights the importance of preventive care. Regular screening for neuropathy and vascular issues allows early intervention before complications become severe. Though orthopedic challenges associated with diabetes may seem overwhelming, understanding these risks empowers you to take proactive steps. Remember that early detection, consistent monitoring, and appropriate lifestyle modifications significantly reduce your risk of developing serious musculoskeletal complications that could permanently affect your mobility and quality of life.

FAQs

Q1. What are the most common orthopedic complications associated with diabetes?

A1. Common orthopedic complications in diabetic patients include Charcot foot, diabetic foot ulcers, osteoarthritis, frozen shoulder, Dupuytren’s contracture, and diffuse idiopathic skeletal hyperostosis (DISH). These conditions can significantly impact mobility and quality of life.

Q2. How does diabetes affect bone healing?

A2. Diabetes can delay bone healing by up to 87%. It impairs the inflammatory phase, decreases bone formation, and alters stem cell differentiation in fracture sites. This results in a higher risk of complications such as delayed union, non-union, and redislocation of fractures.

Q3. What are the risks of orthopedic surgery for diabetic patients?

A3. Diabetic patients face increased risks during orthopedic surgery, including higher rates of surgical site infections, longer hospital stays, and greater chances of cardiovascular complications. Well-controlled diabetes, however, can lead to outcomes similar to those of non-diabetic patients.

Q4. How can diabetic patients prevent orthopedic complications?

A4. Prevention strategies include maintaining good glycemic control, engaging in regular physical activity (including strength training and balance exercises), monitoring for neuropathy and vascular issues, and undergoing regular foot examinations to detect early signs of complications.

Q5. When should a diabetic patient consider surgical intervention for orthopedic issues?

A5. Surgical intervention should be considered when conservative measures fail or when complications threaten limb viability. However, it’s crucial to optimise glycemic control before elective procedures and to assess vascular health, as revascularisation may be necessary before orthopedic surgery in some cases.

About the Doctor

Dr. Manu Mengi is a leading Ortho Doctor in Mohali, specialising in diabetic orthopaedic complications at his state-of-the-art Orthopedic Clinics in Mohali. With decades of experience, he has helped countless patients manage conditions like Charcot foot, diabetic fractures, and joint disorders through evidence-based Orthopedic Treatment in Mohali. Recognised as the Best Orthopedician in Mohali, Dr. Mengi combines advanced surgical expertise with personalised rehabilitation programs to restore mobility and quality of life.

Your Essential Guide to Bone & Joint Health During Pregnancy: From First Trimester to Delivery & Recovery.

Bone & Joint Health During Pregnancy: Expert Guide by Dr. Manu Mengi 

During pregnancy, your body undergoes remarkable changes in bone and joint health, with studies showing that 3 to 5 percent of bone mass can fluctuate throughout this journey. The hormone relaxin loosens your ligaments, while increased estrogen levels help build stronger bones.

However, these changes often bring challenges, especially during the second and third trimesters. Your expanding uterus shifts your centre of gravity, leading to lower back pain, while extra weight creates pressure on your knees and other joints. The good news is that your body becomes more efficient at absorbing calcium during pregnancy, specifically in the later months.

This comprehensive guide, reviewed by Dr. Manu Mengi (Leading Orthopedic Specialist in Mohali), covers everything you need to know about maintaining strong bones and healthy joints throughout your pregnancy. You’ll learn about essential nutrients, safe exercises, and practical strategies to manage common discomforts from your first trimester through recovery.

Understanding Bone and Joint Changes in Early Pregnancy

Your body begins preparing for your baby’s development from the moment of conception. The first trimester marks the beginning of significant bone and joint changes that will continue throughout your pregnancy journey.

How hormones affect your skeletal system

The early weeks of pregnancy trigger a cascade of hormonal changes that directly impact your skeletal system. By 8-12 weeks, you experience the first peak of relaxin, making this an especially vulnerable period for your joints and supporting ligaments. This hormone works by breaking down collagen in targeted tissues and replacing it with a modified form containing higher water content.

Relaxin isn’t working alone, though. Alongside progesterone, it increases connective tissue pliability and extensibility, resulting in reduced passive joint stability. This loosening process begins around 10 weeks of pregnancy, preparing your body for the eventual accommodation of your growing baby.

In contrast to these loosening effects, estrogen plays a protective role for your bones. High estrogen levels during pregnancy are beneficial for bone building, helping to counter some of the potential calcium loss. At the same time, your body begins producing parathyroid hormone-related protein (PTHrP), which increases from the first trimester until labor. This hormone works to suppress and replace regular parathyroid hormone, preventing hyperparathyroidism.

First signs of joint sensitivity

As these hormonal shifts occur, you might begin noticing subtle changes in how your body feels. Early pregnancy often brings minor joint sensitivity that many women dismiss as normal body aches. Nevertheless, the combination of ligament relaxation due to relaxin, postural shifts, and beginning weight changes can trigger initial discomfort.

You may first notice these changes when performing daily activities, as some joints begin losing their normal stability. At the microstructural level, bone biopsies suggest increased bone resorption occurs as early as 8-10 weeks of pregnancy, though this process typically normalizes by term.

Many women report slight discomfort in the pelvic region, particularly around the sacroiliac joints. Furthermore, the symphysis pubis experiences measurable changes, with the normal gap of 4-5 mm showing an average increase of 3 mm during pregnancy.

Preparing your body for changes ahead

The first trimester provides a critical window to prepare for the more pronounced joint challenges of later pregnancy. According to pregnancy fitness experts, this is an ideal time to learn proper pelvic bracing techniques that you’ll use throughout your pregnancy.

To protect your joints as they become more vulnerable:

  • Begin strengthening your deep core and pelvic floor muscles immediately
  • Perform cardio and strength exercises in a controlled manner to avoid hyperextending joints
  • Increase your calcium intake through food sources rather than supplements for better absorption
  • Be mindful of your posture as your center of gravity begins to shift

Although your joints are becoming more relaxed, the good news is that bone resorption appears to be regained through the addition of new trabeculae by late pregnancy. Additionally, your intestinal calcium absorption improves during early pregnancy to help meet your baby’s growing calcium requirements.

Consider speaking with your healthcare provider about appropriate prenatal exercises that can strengthen the muscles surrounding your joints. Consequently, this additional support becomes vital as your ligaments continue to loosen throughout pregnancy. With proper preparation now, you can significantly reduce discomfort in the coming months as your body continues its remarkable adaptation process.

Second Trimester: Managing Increasing Joint Pressure

As your pregnancy progresses into the second trimester, the subtle joint changes you experienced earlier become more pronounced. The growing weight of your baby, combined with hormonal shifts, creates new challenges for your skeletal system, particularly affecting your back, pelvis, and knees.

Why does back pain typically begin now?

Most pregnant women experience back pain starting in the second half of pregnancy. This timing isn’t random – it corresponds with several significant bodily changes. As your uterus expands, it puts pressure on the blood vessels and nerves in your pelvis and back, creating discomfort that wasn’t present before.

Moreover, your centre of gravity shifts noticeably during this period. Your body gradually begins to adjust posture and movement patterns, often without you even realising it. The pelvis also tilts forward as pregnancy progresses, creating a chain reaction through your spine.

Perhaps most importantly, the hormone relaxin continues its work, allowing ligaments supporting the spine to loosen. This increased flexibility, while essential for childbirth preparation, leads to greater instability and potential pain throughout your back.

The science behind pelvic expansion

The second trimester marks a critical period for pelvic joint changes. Your pelvis begins a measurable process of expansion, with both the anterior and posterior pelvic joints continually opening to accommodate your growing baby. This expansion is directly facilitated by relaxin, which helps your pelvic joints and ligaments relax.

From a biomechanical perspective, your pelvis serves a crucial function – transferring loads generated by body weight and gravity during daily activities. This function becomes even more vital now as your body weight increases substantially over a relatively short period.

Research shows that increased pelvic asymmetry during pregnancy is a risk factor for pregnancy-related sacroiliac joint pain. The relatively small and flat sacroiliac joint of women compared to men, combined with hormonal weakening of ligaments, often leads to sacroiliac joint instability.

Protecting your knees as weight increases

In the second trimester, more structural changes begin to affect your knees. The forward tilting pelvis realigns your center of gravity, subtly changing your posture and how exercise puts stress on your knees.

Increased weight puts direct pressure on your knees and may intensify any existing knee discomfort. Additionally, gaining water weight during this period can increase stiffness in your feet, hips, knees, and ankles.

To protect your knees:

  • Wear supportive, comfortable footwear with good arch support instead of high heels
  • Try core stability exercises like side planks, clam shells, and leg raises
  • Perform foot strengthening exercises such as toe-stands and foot arch lifts
  • Take time to rest, giving your joints regular breaks

Safe exercises for maintaining joint stability

Building off first trimester core strengthening, you can now add functional movements that support joint stability. Regular exercise during this period improves range of motion and keeps your joints flexible.

For optimal joint protection, focus on:

  1. Low-impact activities: Walking and swimming are gentler on your joints while still providing excellent conditioning.
  2. Core strengthening: The bird dog exercise increases stability, promotes a neutral spine, and alleviates low back pain. It improves posture while strengthening your core, hips, and back muscles.
  3. Lower body support: Squats strengthen your abdominal and leg muscles, helping prepare you for labour while reducing the risk of knee and ankle injuries.
  4. Pelvic stability: Standing pelvic tilts help alleviate back pain by relieving lower back stiffness and gently stretching back muscles.

If you experience joint discomfort, applying warm compresses to painful areas and wearing low-heeled, supportive shoes can provide significant relief. Likewise, avoid standing on one leg, and climb stairs one at a time to minimise pelvic stress.

Third Trimester: Navigating Peak Joint Stress

The final stretch of pregnancy brings the heaviest joint burden as your body reaches maximum physical adaptation. The third trimester introduces peak joint stress, with many women experiencing their most significant discomfort during these crucial weeks.

Why do joints hurt more in the final weeks?

The third trimester triggers relaxin’s second peak, creating even greater joint instability at precisely the time your body carries maximum weight. This hormonal surge increases the shearing forces at your pubic symphysis joint, often causing deeper discomfort than in previous months. First of all, your centre of gravity shifts dramatically as your baby grows, forcing your body to compensate through posture adjustments that put additional pressure on your lower back and hips.

Meanwhile, the extra pregnancy weight now places maximum strain on your joints. Your abdominal muscles, increasingly stretched to accommodate your growing uterus, weaken further, providing less support for your spine and contributing to joint discomfort. Above all, the continued loosening of ligaments supporting your pelvis reaches its peak effectiveness in preparation for childbirth.

Managing hip and sacroiliac pain

Wearing a belly band starting in mid-to-late third trimester provides critical support for your abdomen, notably relieving both lower back pain and sacroiliac joint discomfort. To protect vulnerable joints, avoid activities that place uneven weight distribution across your pelvis – no leaning on one leg, no hip jutting, and no crossing your legs when sitting.

For sacroiliac pain management:

  • Rest frequently to take the weight off your pelvis
  • Take smaller, slower steps when walking
  • Climb stairs one at a time to minimise pelvic stress
  • Change positions regularly to avoid prolonged sitting or standing

Wearing supportive footwear becomes increasingly important, as does using hot and cold therapy. Thereafter, consider physical therapy if pain persists, since strengthening your deep core and glutes often helps stabilise the sacroiliac joint.

Sleeping positions that reduce joint pressure

Left-side sleeping offers optimal circulation and reduces swelling, primarily benefiting women with high blood pressure or other complications. Place a pillow between your legs to improve alignment and decrease hip pressure. For lower back discomfort, try side sleeping with a pillow supporting both your legs and under your belly.

If experiencing hip pain, adding a pillow underneath your hips helps improve alignment. Alternatively, if you find yourself on your back, try elevating your upper body at a 45-degree angle using pillows to prevent compression of the vena cava while taking pressure off your spine.

When to be concerned about severe pain

Contact Dr. Manu Mengi, Mohali’s Best Orthopedic Doctor, if joint pain intensifies, prevents normal daily activities, or leads to additional symptoms. Be particularly alert to unrelenting pain, deep, sharp sensations, or sudden inability to walk or get up. Importantly, rhythmic low back pain occurring every few minutes might indicate contractions, which sometimes present as back pain rather than abdominal cramping.

Even if pain seems manageable, mention any joint discomfort at your next appointment. Your provider can help develop strategies to decrease pain and potentially prevent it from worsening as you approach delivery.

Essential Nutrition for Bone Health Throughout Pregnancy

Proper nutrition plays a pivotal role in supporting your changing skeletal system throughout pregnancy. Your nutritional needs shift dramatically as your body works to maintain your bone health while building your baby’s developing skeleton.

Calcium requirements and absorption changes

During pregnancy, your daily calcium needs range from 1200-1500mg depending on your age. Remarkably, your body becomes more efficient at absorbing this vital mineral, with intestinal calcium absorption doubling as early as 12 weeks into pregnancy. This increased absorption appears to be your primary maternal adaptation to meet fetal calcium demands.

Your calcium absorption rate increases from 27% (non-pregnant) to 54% by the fifth or sixth month of pregnancy. This efficiency is crucial because, without adequate intake, your body will extract calcium from your own bones to supply your baby. Studies indicate that high maternal calcium intake positively affects bone mineral density in offspring even at age 16.

Beyond calcium: other minerals your bones need

Calcium doesn’t work alone. Research shows that magnesium and phosphorus also play essential roles in maternal and fetal bone development. Your magnesium needs increase during pregnancy to support proper muscle function and bone formation.

Vitamin D is equally important as it helps your body absorb calcium effectively. Adults need 10 micrograms (400 IU) daily, primarily obtained through sunlight exposure and diet. Without sufficient vitamin D, calcium absorption diminishes significantly – studies demonstrate that maternal vitamin D deficiency correlates with declining bone mineral density.

Foods that fight inflammation and joint pain

Incorporating anti-inflammatory foods can help manage pregnancy-related joint discomfort. Focus on consuming:

  • Fruits rich in antioxidants (blueberries, apples)
  • Leafy greens containing polyphenols and calcium
  • Nuts with protective compounds that fight inflammation
  • Fatty fish providing omega-3 fatty acids and vitamin D
  • Whole grains that help produce anti-inflammatory fatty acids

In fact, studies indicate that polyphenols in foods like coffee may provide additional anti-inflammatory benefits. Garlic, turmeric, and ginger contain potential anti-inflammatory properties that support joint health. Overall, maintaining a Mediterranean-style diet high in fruits, vegetables, and healthy fats offers the best approach for reducing inflammation while supporting optimal bone development.

Practical Daily Movements to Protect Your Joints

Daily movement patterns significantly impact how your joints respond to pregnancy’s changing demands. Small adjustments to your routine activities can make a substantial difference in preventing discomfort and protecting your skeletal system.

Proper sitting and standing postures

For sitting: Keep your back straight with shoulders pulled back, allowing your buttocks to touch the chair back. Place a small pregnancy pillow behind your lower back for added support. Maintain your knees and hips at a 90-degree angle with feet flat on the floor—never cross your legs. Take breaks every 30 minutes, as prolonged sitting increases joint strain.

For standing: Hold your head straight with chin in and shoulders back. Keep knees straight but not locked while maintaining weight balanced evenly on both feet. Avoid standing in the same position for extended periods; elevate one foot on a small stool when standing for longer durations, switching feet every 5-15 minutes to relieve pressure.

Safe lifting techniques when pregnant

First of all, avoid lifting objects heavier than 20 pounds during pregnancy. When lifting is necessary, stand with feet shoulder-width apart and bend at your knees—never at your waist. Keep your back straight while tightening your stomach and pelvic floor muscles before lifting. Hold objects close to your body with your arms bent, taking small steps as you move.

Core stability exercises for back protection

Strengthening your core muscles helps prevent back pain and improves stability. Try these exercises:

  • Pelvic tilts: While lying with knees bent, flatten your lower back against the floor to engage abdominals
  • Bird dog: From hands and knees position, extend opposite arm and leg while maintaining a stable core
  • Wall squats: With back against wall, slide down into a sitting position, engaging thighs and abdominals

Hold strengthening poses for 3-10 seconds, repeating 10-30 times. Remember to breathe out during exertion and in during relaxation.

Using supportive devices effectively

Supportive devices can significantly reduce joint stress. Consider wearing a belly band in later pregnancy to provide abdominal support and relieve lower back pressure. Importantly, research shows seven out of ten pregnant women are willing to change behaviors based on personalized recommendations from wearable monitoring devices.

Conclusion

Pregnancy brings remarkable changes to your bones and joints.

Pregnancy brings remarkable changes to your bones and joints, though understanding these shifts helps you navigate them successfully, for expert guidance, consult Dr. Manu Mengi, the Best Orthopedic Doctor in Mohali, at his clinic for personalised care. Book an appointment today!”. Your body becomes more efficient at absorbing nutrients while hormones prepare your skeletal system for childbirth. This natural wisdom of your body, paired with proper care, supports both your health and your baby’s development.

Maintaining strong bones and stable joints throughout pregnancy requires a balanced approach. Regular gentle exercise, especially activities like swimming and walking, strengthens supporting muscles without overtaxing your joints. Meanwhile, calcium-rich foods and anti-inflammatory nutrients provide essential building blocks for skeletal health.

Small daily adjustments make significant differences in joint comfort. Proper posture, careful movements, and supportive devices reduce unnecessary strain on your changing body. Remember that mild discomfort is normal, though sharp or persistent pain warrants a conversation with your healthcare provider.

After delivery, your joints gradually return to their pre-pregnancy state as hormone levels normalize. This recovery period deserves the same careful attention you gave your body during pregnancy. Stay patient with yourself and maintain the healthy habits you’ve developed – they’ll serve you well beyond pregnancy.

FAQs

Q1. How can I manage joint pain during pregnancy?

A1. To manage joint pain, engage in gentle exercises like swimming or walking, apply warm compresses or ice packs, get adequate rest, and wear supportive gear such as pregnancy belts and cushioned shoes. Also, maintain good posture and consider prenatal massage for relief.

Q2. Which trimester is typically the most challenging for joint health?

A2. The third trimester often presents the greatest challenges for joint health. As your baby grows, there’s increased pressure on your joints, particularly in your lower back, hips, and pelvis. The hormone relaxin peaks during this time, leading to greater joint instability.

Q3. What nutritional considerations are important for bone health during pregnancy?

A3. Focus on calcium-rich foods, as your body becomes more efficient at absorbing calcium during pregnancy. Include other essential minerals like magnesium and phosphorus, and ensure adequate vitamin D intake. Consume anti-inflammatory foods such as leafy greens, fatty fish, and whole grains to support joint health.

Q4. How should I modify my daily movements to protect my joints?

A4. Maintain proper posture when sitting and standing, taking regular breaks to move around. When lifting, bend at your knees, keep your back straight, and avoid heavy objects. Incorporate core stability exercises like pelvic tilts and wall squats to strengthen supporting muscles.

Q5. When should I be concerned about joint pain during pregnancy?

A5. While some discomfort is normal, contact your healthcare provider if you experience severe, persistent pain that interferes with daily activities or if you have sudden difficulty walking or getting up. Also, be aware that rhythmic low back pain could potentially indicate contractions.

For persistent pain, schedule a consultation at Dr. Manu Mengi’s Orthopaedic Clinic in Mohali for expert pregnancy joint care.