Hip pain in middle-aged adults affects countless individuals, with osteoarthritis alone impacting approximately 22.7% of adults in our aging global population. If you’re experiencing discomfort when walking or struggling with stiffness after sitting, you’re certainly not alone. By 2030, nearly 41.1 million adults will be affected by hip osteoarthritis or similar joint complaints—almost double the number reported in 2005.
What starts as an occasional twinge can quickly develop into a persistent problem, potentially limiting your daily activities. Hip pain while climbing stairs, morning stiffness, and discomfort that worsens at night are all common symptoms that might indicate early hip osteoarthritis or other conditions. Importantly, most hip pain can be treated with simple self-help approaches, though extremely severe pain or discomfort lasting more than two weeks despite regular painkillers warrants a doctor’s visit. In this comprehensive guide, we’ll explore the causes behind middle-aged hip pain, how doctors diagnose these issues, and the various non-surgical treatment options available to help you regain mobility and comfort.
Understanding the Hip Joint and Why It Hurts
The hip serves as one of the body’s largest and most critical weight-bearing joints, acting as the essential connection point between your upper and lower body. Understanding how this complex joint functions provides valuable insight into why middle-aged adults frequently experience hip discomfort.
How the hip joint works
Your hip is a remarkable ball-and-socket joint where the rounded head of your thigh bone (femur) fits snugly into a cup-like depression called the acetabulum in your pelvis. This design creates exceptional stability while allowing for an impressive range of motion in multiple directions. Unlike other joints, the hip is exceptionally deep, with the acetabulum encompassing nearly all of the femoral head, significantly reducing the risk of dislocation.
Both the femoral head and acetabulum are covered with articular cartilage—a smooth, slippery substance that protects the bones and enables frictionless movement. Meanwhile, a thin tissue lining called the synovium produces fluid that lubricates the joint. For additional stability, the acetabular labrum—a fibrocartilaginous collar—deepens the socket by 21% and increases the joint surface area by 28%, enhancing force distribution.
The hip’s remarkable strength comes from its supporting cast of muscles, tendons and ligaments. These structures work together to facilitate various movements:
- Flexion and extension (moving your leg forward and backward)
- Internal and external rotation
- Abduction and adduction (moving your leg away from and toward your body’s midline)
Furthermore, these surrounding tissues provide crucial support for weight-bearing activities like standing, walking, and climbing stairs.
Why middle-aged adults are more prone to hip issues
Hip pain affects approximately 10% of the general population, with prevalence increasing significantly with age. In fact, research shows that 14.3% of adults report experiencing significant hip pain on most days over a six-week period.
Middle-aged adults are particularly vulnerable because decades of use lead to natural wear and tear on the joint. Osteoarthritis—the most common cause of hip pain in this age group—affects the majority of people older than 55. Indeed, the hip is the second most common joint affected by osteoarthritis, potentially impacting up to 25% of individuals over age 55.
As you approach middle age, several factors can accelerate joint deterioration. The protective cartilage in your hip begins to thin and fray, narrowing the protective space between bones. In advanced cases, bone may rub directly against bone, creating painful friction with every movement. Additionally, damaged bones sometimes grow outward, forming bone spurs (osteophytes) that further complicate joint mechanics.
Risk factors that make middle-aged adults more susceptible include carrying excess weight, previous hip injuries or surgeries, occupations requiring repetitive hip stress, poorly aligned hip joints from birth conditions, and genetic predisposition.
Common areas where hip pain is felt
Hip discomfort manifests differently depending on which structures are affected, often creating confusion about the true source of pain. The location provides important clues about potential causes.
Pain in the groin area typically indicates problems with the actual hip joint itself and is especially common in early osteoarthritis. Conversely, discomfort along the outer hip might suggest issues like greater trochanteric pain syndrome or bursitis.
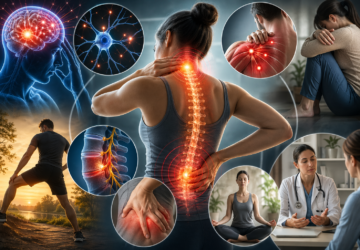
Many patients experience referred pain, where discomfort radiates beyond the hip itself. This commonly extends to the thigh, buttocks, knee, or lower back. Moreover, hip problems frequently cause pain in the knee, sometimes becoming the only symptom—a phenomenon called referred pain.
Pain patterns often fluctuate throughout the day. Morning stiffness that improves with movement suggests inflammatory conditions, whereas pain worsening with activity points toward mechanical issues. Nighttime discomfort disturbing sleep can indicate advanced joint degeneration.
Understanding these patterns helps doctors pinpoint exactly what’s happening inside your hip joint—the crucial first step toward effective treatment.
Recognizing the Symptoms of Hip Trouble
Identifying the specific symptoms of hip problems early can help you seek appropriate treatment before the condition worsens. Middle-aged adults often dismiss these warning signs as normal aging, subsequently delaying diagnosis and treatment. Let’s explore the telltale symptoms that suggest your hip pain requires medical attention.
Groin pain and hip joint stiffness
For many middle-aged adults, hip problems initially present as pain in the groin area. This groin pain typically indicates issues with the actual hip joint itself rather than surrounding tissues. In fact, osteoarthritis—the most common form of arthritis affecting the hip—frequently causes pain that’s felt primarily between the hip and knee.
This discomfort can manifest as:
- Sharp or dull aching sensations
- Tenderness around the hip region
- Difficulty bending down or picking up objects from the ground
Hip joint stiffness commonly accompanies this pain, making simple movements feel restricted or uncomfortable. You might notice this stiffness after sitting for extended periods or when attempting to put on socks or shoes. As can be seen in cases of osteoarthritis, this stiffness is often more pronounced in the morning or after periods of inactivity.
Hip pain while walking or climbing stairs
Pain during everyday activities like walking serves as another key indicator of hip problems. Primarily, this discomfort may start gradually but intensify with continued movement. The pain might feel most severe when bearing weight on the affected side or when initiating movement after sitting.
Climbing stairs presents a particularly revealing challenge for those with hip issues. This activity requires your hip muscles to work 4-5 times harder than during a simple squat. Many conditions cause pain specifically during this motion:
Bursitis can trigger considerable discomfort on the outside of your hip that noticeably flares when navigating stairs. Similarly, those with femoroacetabular impingement (FAI) often feel pain in the groin area that intensifies when climbing or descending steps. Even a strained hip flexor can create pain that worsens with stair-climbing movements.
Night hip pain and morning stiffness
Despite what many assume, hip pain at night isn’t just a normal part of aging. Yet more than one-third of U.S. adults report that hip, knee, or foot pain disrupts their sleep. Nighttime discomfort might result from your sleeping position putting pressure on an already irritated joint, particularly for side sleepers.
The nature of this nocturnal pain provides important diagnostic clues. Persistent pain throughout the night, especially when trying to lie on the affected side, often suggests bursitis. In contrast, pain that prevents comfortable positioning and wakes you repeatedly might indicate more advanced joint degeneration.
Morning stiffness represents another characteristic symptom. This sensation typically feels most pronounced immediately after waking and gradually improves with movement throughout the day. In rheumatoid arthritis, for instance, stiffness and pain worsen after periods of inactivity. This pattern differs from mechanical issues where pain typically increases with activity rather than decreases.
Pain radiating to thigh or buttocks
Hip problems rarely confine their symptoms to the hip joint itself. Instead, pain commonly radiates outward, creating confusing symptom patterns. For instance, hip joint problems can cause referred pain in the knee—sometimes becoming the only apparent symptom.
Pain that radiates to the outer thigh and buttock area often indicates conditions like greater trochanteric pain syndrome (GTPS). At this point, the discomfort might feel sharp or burning and intensify with certain movements or positions.
Piriformis syndrome represents another common cause of radiating hip pain. This condition produces aching, burning, or numbness sensations in the buttock that may extend down the back of your leg. These symptoms typically worsen when sitting for long periods, walking, running, or climbing stairs.
Understanding these distinctive symptom patterns helps both you and your doctor determine the underlying cause of your hip pain—an essential first step toward finding relief.
What’s Causing Your Hip Pain?
Understanding what’s actually happening inside your hip joint provides crucial insights into finding the right treatment approach. After examining thousands of middle-aged patients, orthopedic specialists have identified several distinct conditions that commonly cause hip pain in this age group.
Early hip osteoarthritis
Osteoarthritis (OA) stands as the primary culprit behind hip discomfort in middle-aged adults. This degenerative joint disease affects nearly 27 million Americans, with hip OA specifically impacting up to 25% of individuals over age 55. The condition develops gradually as protective cartilage wears away, eventually leading to bone-on-bone friction.
Early-stage osteoarthritis typically presents with:
- Morning stiffness lasting less than 30 minutes
- Pain that improves with brief activity but worsens with extended use
- Gradually decreasing range of motion
While age remains the strongest risk factor, additional contributors include previous joint injuries, genetic predisposition, and carrying excess weight. Indeed, each pound of body weight adds approximately 3-6 pounds of pressure on weight-bearing joints like hips.
Greater trochanteric pain syndrome
Previously called trochanteric bursitis, greater trochanteric pain syndrome (GTPS) affects between 10-25% of the general population. This condition involves pain and tenderness over the bony prominence (greater trochanter) on the outside of your hip. Women experience GTPS approximately four times more frequently than men, primarily between ages 40-60.
GTPS typically creates sharp lateral hip pain that intensifies during prolonged walking, stair climbing, or lying directly on the affected side. Unlike osteoarthritis, GTPS rarely causes groin pain or internal hip joint stiffness.
Femoroacetabular impingement (FAI)
Femoroacetabular impingement occurs when extra bone grows along the femoral head (cam impingement) or along the acetabulum (pincer impingement). This abnormal bone contact creates friction during movement, potentially damaging the joint and accelerating arthritis development.
FAI commonly affects active middle-aged adults, with symptoms including groin pain during specific movements, limited range of motion, and a catching sensation during hip flexion. Many patients report discomfort when sitting for extended periods or during deep squatting movements. Consequently, FAI often contributes to long-term hip joint damage if left untreated.
Trochanteric bursitis and gluteus medius tendinopathy
The hip contains numerous fluid-filled sacs called bursae that cushion tendons and muscles. Trochanteric bursitis develops when these sacs become inflamed, typically producing pain on the outer hip that may radiate down the thigh.
Essentially connected to this condition, gluteus medius tendinopathy involves degeneration of the tendon that attaches your gluteus medius muscle to the greater trochanter. This condition frequently causes pain that:
- Worsens when lying on the affected side
- Intensifies with prolonged standing or walking
- Creates tenderness when pressing on the outer hip
These conditions often coexist and affect women more commonly than men, particularly those with one leg longer than the other or who have a wider pelvis.
Piriformis syndrome and referred pain from lumbar spine
Not all hip pain originates in the hip joint itself. Piriformis syndrome occurs when the piriformis muscle deep in your buttock irritates or compresses the sciatic nerve. This creates pain in the buttock that sometimes radiates down the back of the leg, mimicking sciatica.
Additionally, problems in your lower back frequently refer pain to the hip region. Herniated disks, spinal stenosis, or facet joint arthritis in the lumbar spine can create discomfort that radiates to the hip, thigh, or buttock. Notably, this referred pain often creates confusion during diagnosis, as patients perceive the discomfort as originating from the hip rather than the spine.
Understanding these distinct conditions helps explain why treatment approaches vary significantly depending on the underlying cause of your hip pain.
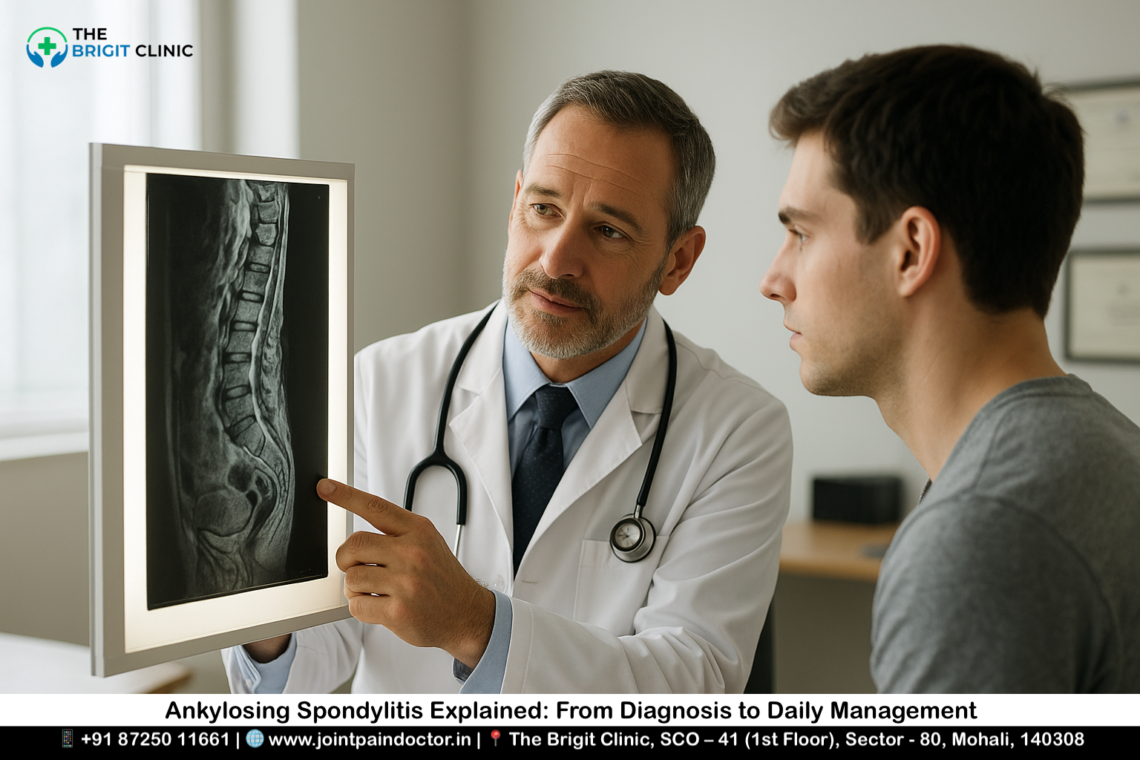
How Doctors Diagnose Hip Pain
When hip pain persists beyond two weeks despite over-the-counter pain relievers, a doctor’s visit becomes necessary. Diagnosing the exact cause requires a methodical approach, often beginning with your detailed medical history and progressing through various examination techniques.
Physical examination and movement tests
First and foremost, doctors rely on a comprehensive physical examination to assess your hip. This systematic approach helps identify the four main pain generators: osteochondral (bone and cartilage), capsulolabral (joint capsule and labrum), musculotendinous (muscles and tendons), and neurovascular structures.
The examination typically includes:
- Gait analysis: Walking 6-8 strides reveals foot progression angle, stance phase, and potential limping patterns. An antalgic gait (limping to avoid pain) or Trendelenburg gait (pelvic drop due to weak hip abductors) provides important diagnostic clues.
- Palpation: The doctor feels for tenderness over specific areas including the greater trochanter, iliopsoas, and pubic tubercle to identify pain sources.
- Range of motion tests: Passive movement of both hips helps detect limitations or pain during specific movements.
Coupled with these observations, doctors perform specialized tests like the FADIR test (flexion, adduction, internal rotation), which reproduces pain in conditions like femoroacetabular impingement. Likewise, the FABER test (flexion, abduction, external rotation) can identify issues with the hip joint, sacroiliac joint, or iliopsoas tendon.
Hip X-ray findings and what they reveal
X-rays remain the initial imaging choice for hip pain, offering excellent visualization of bone structures. Standard views include an anteroposterior (AP) view of the pelvis and a lateral view of the affected hip.
On balance, these images reveal:
- Joint space narrowing (normal space is typically 3-5mm) indicating cartilage loss
- Osteophytes (bone spurs) suggesting osteoarthritis
- Fractures or alignment issues
- Subchondral sclerosis or cysts in advanced joint disease
Radiologists often trace Shenton’s line, which follows the medial edge of the femoral neck and inferior edge of the superior pubic ramus. An interruption in this line may suggest a fracture or other structural abnormality.
According to medical findings, many hip fractures aren’t visible on initial X-rays, potentially requiring follow-up imaging if pain persists. Overall, standing AP radiography of the pelvis is typically the first imaging test, showing joint space narrowing and osteophyte formation in osteoarthritis cases.
When MRI is needed for deeper insight
In cases where X-rays appear normal yet symptoms persist, magnetic resonance imaging (MRI) provides superior visualization of soft tissues. Above all, MRI excels at detecting:
- Labral tears and cartilage damage
- Stress fractures invisible on X-rays
- Tendon inflammation or degeneration
- Early arthritis changes before X-ray findings appear
- Avascular necrosis (bone tissue death due to poor blood supply)
For younger patients with labral tears, a special type called MRI arthrogram may be recommended. During this procedure, a radiologist injects contrast fluid into the joint to better visualize the labrum. In addition to diagnosis, MRI helps guide therapy decisions, including determining whether surgery might be necessary.
Differentiating mechanical vs inflammatory hip pain
A key aspect of hip pain diagnosis involves distinguishing between mechanical and inflammatory causes. Mechanical pain typically worsens with activity and improves with rest, suggesting structural issues like osteoarthritis or impingement.
In contrast, inflammatory pain often creates morning stiffness lasting more than 30 minutes, improves with movement, and may be accompanied by systemic symptoms like fever. Blood tests can help identify inflammatory conditions like rheumatoid arthritis.
One valuable diagnostic tool involves ultrasound-guided anesthetic injection into the hip joint. This procedure helps differentiate intra-articular pain (originating inside the joint) from referred pain coming from the lumbar spine or surrounding structures. Should the pain disappear temporarily after injection, the source is likely within the joint itself.
Red flags requiring immediate medical attention include fever (suggesting infection), sudden onset severe pain, inability to bear weight, significant deformity, or symptoms like unexplained weight loss.
Treatment Options Doctors Recommend First
For patients suffering from hip discomfort, doctors typically recommend a stepped approach to treatment, beginning with conservative measures before considering surgical options. Understanding these initial treatments can help manage pain effectively while potentially preventing further joint deterioration.
Pain relief medications and NSAIDs
Most doctors initially suggest over-the-counter pain relievers to manage hip discomfort. Non-steroidal anti-inflammatory drugs (NSAIDs) like ibuprofen, aspirin, and naproxen work by reducing inflammation and relieving pain simultaneously. Alternatively, acetaminophen (Tylenol) targets pain without addressing inflammation, making it suitable for those unable to take NSAIDs due to allergies or stomach problems.
Generally, these medications should not be taken for more than 10 days consecutively without consulting your healthcare provider. For persistent pain, your doctor might prescribe stronger medications or different formulations—including topical NSAIDs like Voltaren Gel that can be applied directly to painful areas.
Physiotherapy for hip pain and strengthening
Physical therapy stands as a cornerstone treatment for hip pain, particularly for conditions like osteoarthritis or after hip surgery. A trained therapist designs personalized exercise programs that target your specific limitations. Research shows that effective therapy regimens often include:
- Manual therapy techniques (thrust, non-thrust, and soft tissue mobilization)
- Individualized strengthening exercises for weak hip muscles
- Stretching routines to improve flexibility and joint mobility
- Functional training to enhance balance and gait
Therapy frequency typically ranges from 1-5 sessions weekly over 6-12 weeks for optimal results. As motion improves, your therapist will progressively add exercises to maintain gains in strength and flexibility.
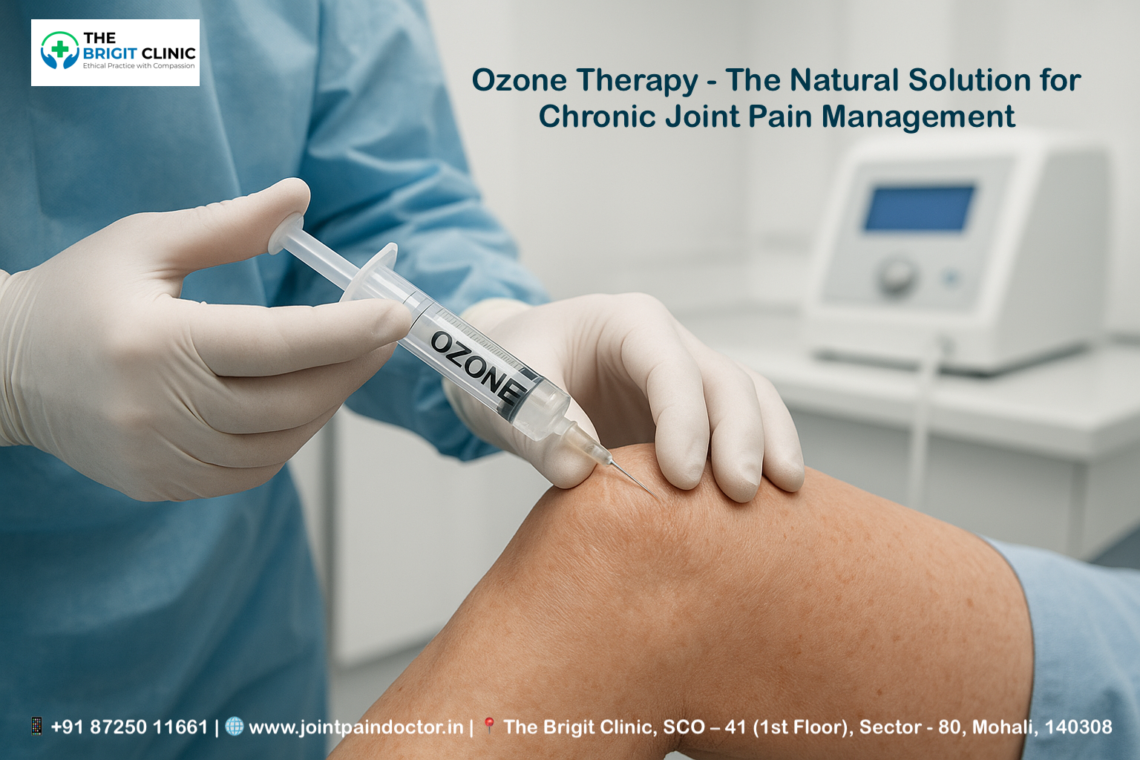
Steroid and PRP injection therapy
When medications and physical therapy provide insufficient relief, injection therapies offer another non-surgical option. Corticosteroid injections remain the most reliable pain-relieving injection for hip pain, working by deactivating inflammatory cells in the joint that trigger pain signals. These injections can provide relief lasting from several weeks to six months.
Platelet-rich plasma (PRP) injections represent an alternative approach using components from your own blood to accelerate healing. Although primarily used for tendon injuries, some evidence suggests PRP may benefit patients with osteoarthritis of the hip. Importantly, doctors recommend avoiding NSAIDs before or after PRP injections as they can impact effectiveness.
Activity modification and posture correction
Alongside medical interventions, simple lifestyle adjustments often provide substantial relief. The RICE method—Rest, Ice, Compression, and Elevation—serves as an effective first-line approach for managing acute hip pain. Maintaining proper posture during daily activities helps reduce strain on the hip joint.
Weight management remains crucial since excess pounds significantly increase pressure on weight-bearing joints. Each pound of body weight adds 3-6 pounds of pressure to your hips, making weight reduction a powerful pain management strategy.
Patient education should focus on activity modification, supportive weight reduction strategies, and methods for unloading arthritic joints. Such conservative approaches often provide meaningful relief without the risks associated with more invasive treatments.
Preventing Hip Pain from Getting Worse
Taking proactive steps to protect your hip joint can significantly reduce pain and slow disease progression. Looking beyond temporary relief, these prevention strategies address the root causes of hip problems.
Weight loss for hip pain relief
Shedding excess pounds creates one of the most dramatic improvements for hip pain sufferers. Every 10 pounds of additional weight puts an extra strain of more than 25 pounds on your hip joints. This mechanical stress accelerates cartilage degradation.
Studies confirm a direct dose-response relationship between weight loss and hip pain improvement. Patients losing more than 10% of body weight experienced the greatest reduction in pain—up to 31% improvement in hip-related quality of life. Nonetheless, approach weight loss gradually; rapid reduction can potentially increase joint instability and bone loss.
Best exercises for hip pain prevention
The right movement strengthens supporting muscles without aggravating your condition. Focus primarily on low-impact activities like:
- Walking, swimming, or cycling to improve joint mobility
- Targeted exercises strengthening glutes, hip flexors, and abductors
- Gentle stretching to maintain flexibility
Proper form remains vital—a physical therapist can develop a personalized routine addressing your specific limitations. Always warm up before and cool down after exercise.
Lifestyle changes for hip arthritis
Beyond exercise, dietary modifications profoundly impact joint health. A Mediterranean-style diet rich in fruits, vegetables, fish, nuts, and beans helps curb inflammation. Whole grains contain fiber that can lower blood levels of inflammatory markers.
Consider using supportive devices like canes or walking frames to reduce pressure on painful hips. Furthermore, applying heat can relax muscles and improve joint lubrication.
Avoiding overuse and improving daily habits
Pay careful attention to daily movement patterns. Avoid sitting for extended periods—even shifting positions slightly helps relieve joint stress. Proper footwear with good arch support provides essential foundation for hip alignment.
Listen to your body’s warning signals—never “play through pain” during physical activities. Rest appropriately between workouts. Additionally, maintain proper posture during sitting, standing, and lifting to minimize joint strain.
Making these preventive measures part of your daily routine offers the best chance for long-term hip joint health.
Conclusion
Hip pain affects millions of middle-aged adults worldwide, yet many suffer unnecessarily before seeking proper medical attention. Throughout this article, we’ve explored how your hip functions, why it becomes painful with age, and what treatments actually work. Most importantly, hip pain rarely requires immediate surgical intervention.
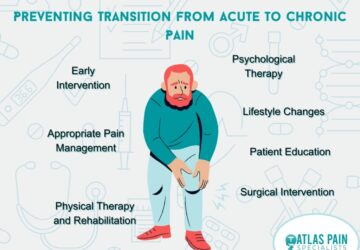
Early intervention makes all the difference in managing hip discomfort effectively. Simple approaches like over-the-counter pain relievers, physical therapy, and lifestyle modifications often provide significant relief. Weight management stands out as particularly powerful—each pound lost removes 3-6 pounds of pressure from your weight-bearing joints.
Understanding your specific symptoms helps identify the underlying cause, whether it’s osteoarthritis, greater trochanteric pain syndrome, or referred pain from your spine. Pain location, timing, and triggers all provide valuable clues for proper diagnosis and treatment.
Remember that conservative treatments work for most people. Physical therapy strengthens supporting muscles while medications reduce inflammation and pain. Additionally, activity modifications and proper posture prevent further joint damage during daily activities.
Though hip pain can feel debilitating, you don’t have to accept it as an inevitable part of aging. Proactive steps like maintaining a healthy weight, choosing low-impact exercises, and following proper movement mechanics can slow disease progression substantially.
Ultimately, your hips support you through countless movements each day. They deserve attentive care when they signal distress. Armed with the knowledge from this guide, you can work effectively with healthcare providers to address hip pain and maintain your mobility for years to come.
Key Takeaways
Hip pain affects 22.7% of middle-aged adults, but most cases can be effectively managed without surgery through proper diagnosis and conservative treatment approaches.
• Early intervention is crucial – Don’t ignore persistent hip pain lasting more than two weeks, as early treatment prevents progression and maintains mobility.
• Weight loss provides dramatic relief – Every 10 pounds lost removes 25+ pounds of pressure from hip joints, with 10% weight reduction improving pain by up to 31%.
• Conservative treatments work for most people – Physical therapy, NSAIDs, activity modification, and lifestyle changes effectively manage pain without surgical risks.
• Pain location reveals the cause – Groin pain typically indicates joint problems, while outer hip pain suggests bursitis or tendon issues, helping guide proper treatment.
• Prevention strategies slow progression – Low-impact exercise, proper posture, Mediterranean diet, and avoiding prolonged sitting protect joints from further damage.
The key to successful hip pain management lies in understanding that most conditions respond well to non-surgical approaches when addressed promptly. By combining medical treatment with lifestyle modifications, middle-aged adults can maintain hip health and prevent minor discomfort from becoming debilitating pain.
FAQs
Q1. What are the most effective treatments for hip pain in middle-aged adults?
Doctors typically recommend a combination of over-the-counter pain relievers like NSAIDs, physical therapy exercises, and lifestyle modifications such as weight loss. For persistent pain, corticosteroid injections or prescription medications may be considered. The key is early intervention and a personalized treatment approach.
Q2. How can I manage hip pain associated with aging?
Managing hip pain as you age involves staying active with low-impact exercises like swimming or cycling, maintaining a healthy weight to reduce joint stress, and following a proper exercise routine to strengthen hip muscles. Additionally, using supportive devices and making ergonomic adjustments in daily activities can help alleviate discomfort.
Q3. When should I see a doctor about my hip pain?
\ Seek medical attention if hip pain persists for more than two weeks despite over-the-counter pain relievers, or if you experience severe pain, sudden swelling, inability to bear weight, or fever. Additionally, any noticeable changes in hip joint appearance or function warrant immediate medical evaluation.
Q4. What are the initial steps in diagnosing hip pain?
Diagnosis typically begins with a thorough physical examination, including gait analysis and specific movement tests. X-rays are often the first imaging choice to assess bone structures and joint spacing. If needed, MRI may be used for a more detailed view of soft tissues. Your doctor may also use diagnostic injections to pinpoint the pain source.
Q5. Can lifestyle changes help prevent hip pain from worsening?
Yes, lifestyle modifications can significantly impact hip health. Maintaining a healthy weight reduces joint stress, while regular low-impact exercise strengthens supporting muscles. Following a Mediterranean-style diet may help reduce inflammation. Proper posture, ergonomic adjustments, and avoiding prolonged sitting can also prevent further joint damage.

Dr. Manu Mengi is a best orthopedic doctor in Mohali, specializing in joint pain, arthritis, and sports injuries. With qualifications in orthopedics and advanced training in joint replacement, he provides effective care for bone and joint conditions, helping patients improve mobility and manage pain with the right treatment approach.